
Dancing in Nature’s Spirals
Designed and quilted by Jackie Berry
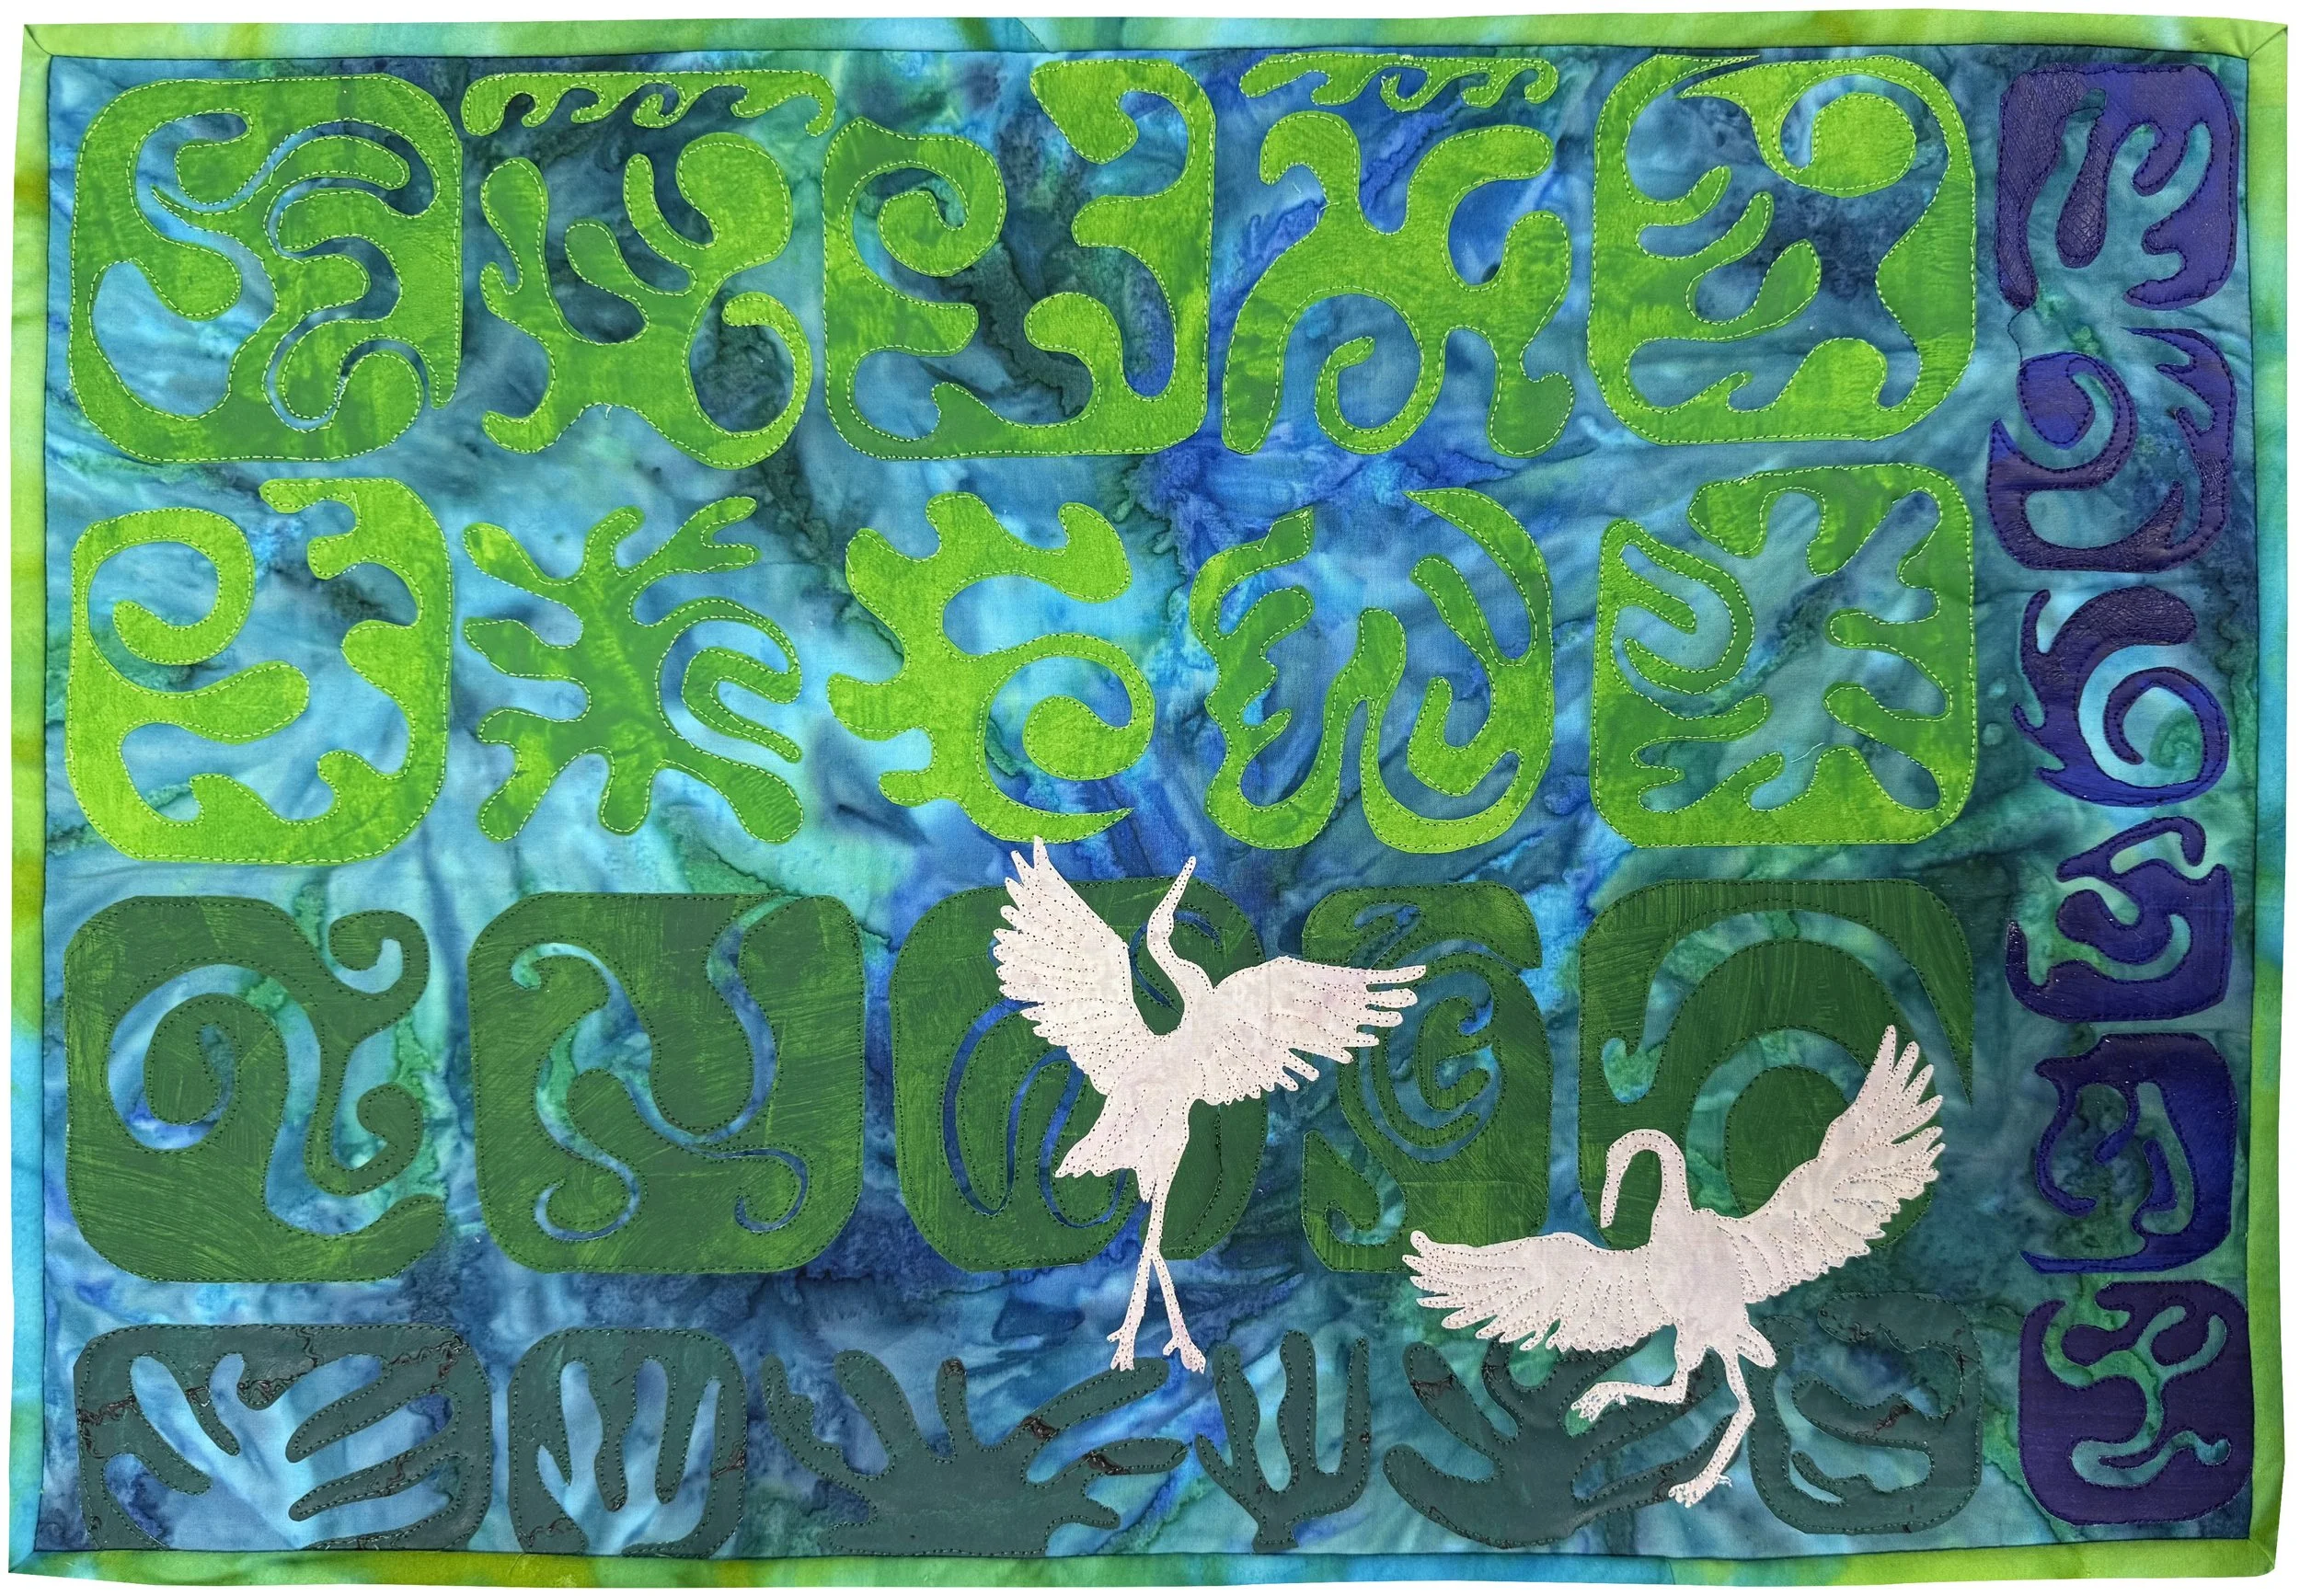
Made in memory of the Sandhill Crane photoshoot in Nebraska
Finished in March 15, 2025
24” width x 16” length

I was inspired by this quilt at a presentation by Marilyn Smith.

This was another of this technique that she showed us.

I worked on spacing, cut more squares…..

which was SO MUCH FUN to see what shape materialized…

… and rearranged again and again.

…then appliquéd them down.

Close up of the appliqué….
A quilter in our town, Marilyn Smith, did a presentation for our art group. The group has admired Marilyn’s quilts and she agreed to do a trunk show for us. We were enthralled by her quilts, but we found one quilt for which we thought we might like to learn the technique. It was unique, looked bright and cheerful and looked like fun.
Marilyn uses white (usually PDF) cotton fabric. She cuts out 19” squares of fabric because Wonder Under is 17” wide. She irons the Wonder Under onto the back of the fabric. This helps keep a barrier for the paint to not seep through. She places plastic drop cloth or something under the piece to keep table surface clean. She pins the fabric to the drop cloth, so it doesn’t move around and paints the Jacquard on thick. The thicker it is, the easier it is to cut.
She showed us tools she uses to make texture marks in the paint. You can also paint the fabric, place down stretched cheese cloth on top of the paint, then paint OVER it again. This will “cement” it to the fabric.
Once dry, she heat sets with cloth over it for 30 seconds. Tip - iron from the backside not the paint side.
With the paint side down, cut shapes with rulers. The first thing she does with the square or rectangle shapes is the round off the corners to make it look organic. You can actually use the “spiral” and the negative of it to increase the amount of pieces to be used. ALSO, you can retouch a piece to make it more aesthetic and pleasing to you. You could also cut the negative into smaller pieces to fit in the space needed for your background.
I’ve been wanting to do a quilt with sand hill cranes that we photographed in Nebraska, but too many things to do and not enough time. I will do another quilt with the birds if time allows, but I thought I’d take this opportunity to place a couple of silhouettes on this quilt. I had purchased crane stencils years ago. I used them to cut out outline shapes of the cranes to pop against the, what I’m calling “swirls” or spirals. Marilyn had painted fabric before the meeting for us to use. I chose different values of green, intending to “anchor” the piece with a dark one and gradually getting lighter as though the sky at the top. I was given a couple of blues, and decided to add them in a row to the right, just for aesthetics.
I worked on spacing, cut more squares (which was SO MUCH FUN to cut and see what shape materialized), and rearranged.
I continued to do so until I had it the way I wanted them and then appliquéd them down.
Tips:
1.You have an entry point. (You can actually have two and do in halves.) Remember, you have to turn, pivot and go out.
2.Leave enough room to come out.
3.ALSO, make it wide enough that you can have enough room to raw edge down both sides of the pattern.
4.When CUTTING, KEEP WRIST straight, ROTATE THE PAPER instead.
5.When ironing the spirals down to the background, put a cloth over the painted surface to protect the paint when you iron it down.
6.Practice FIRST on construction paper, to get a feel of how to space your cuts and how to hold the wrist straight.