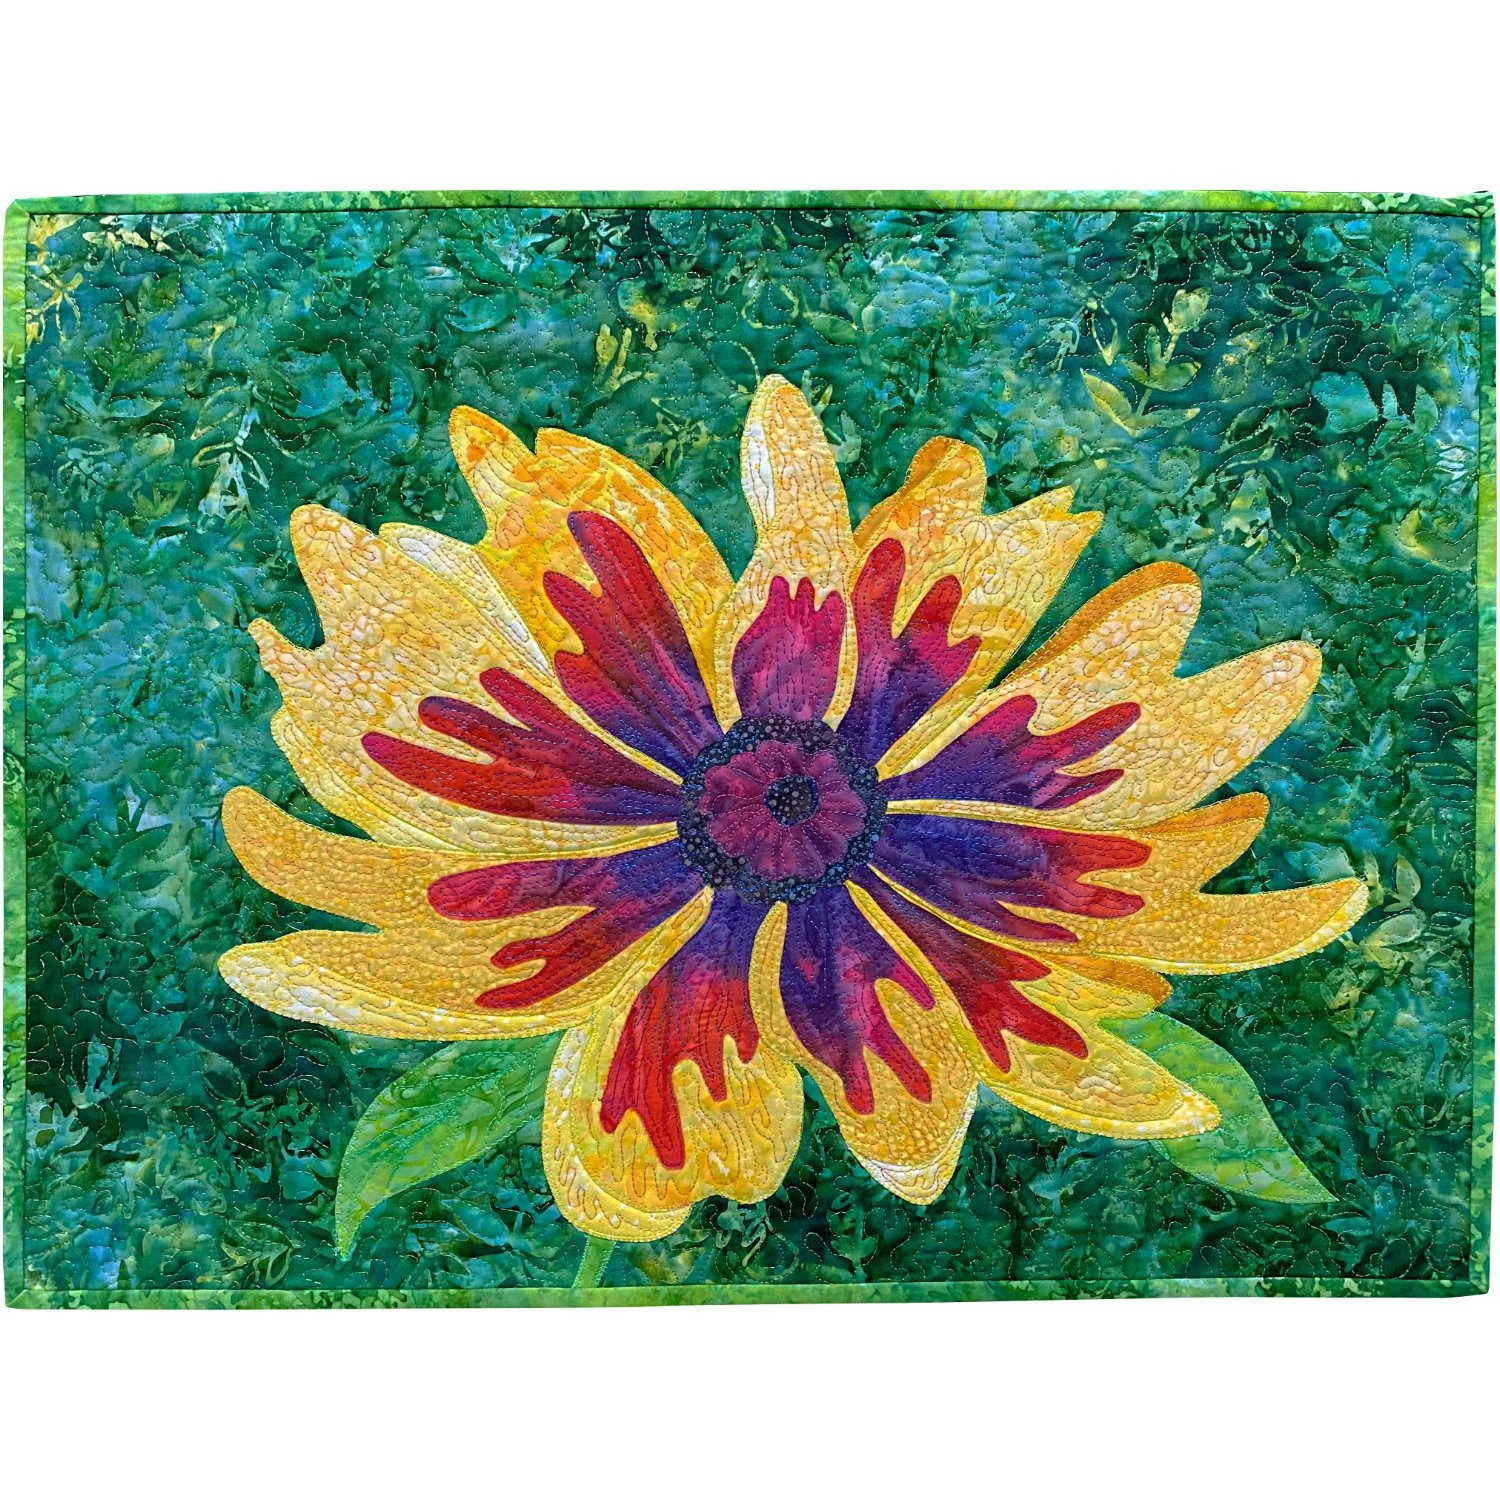
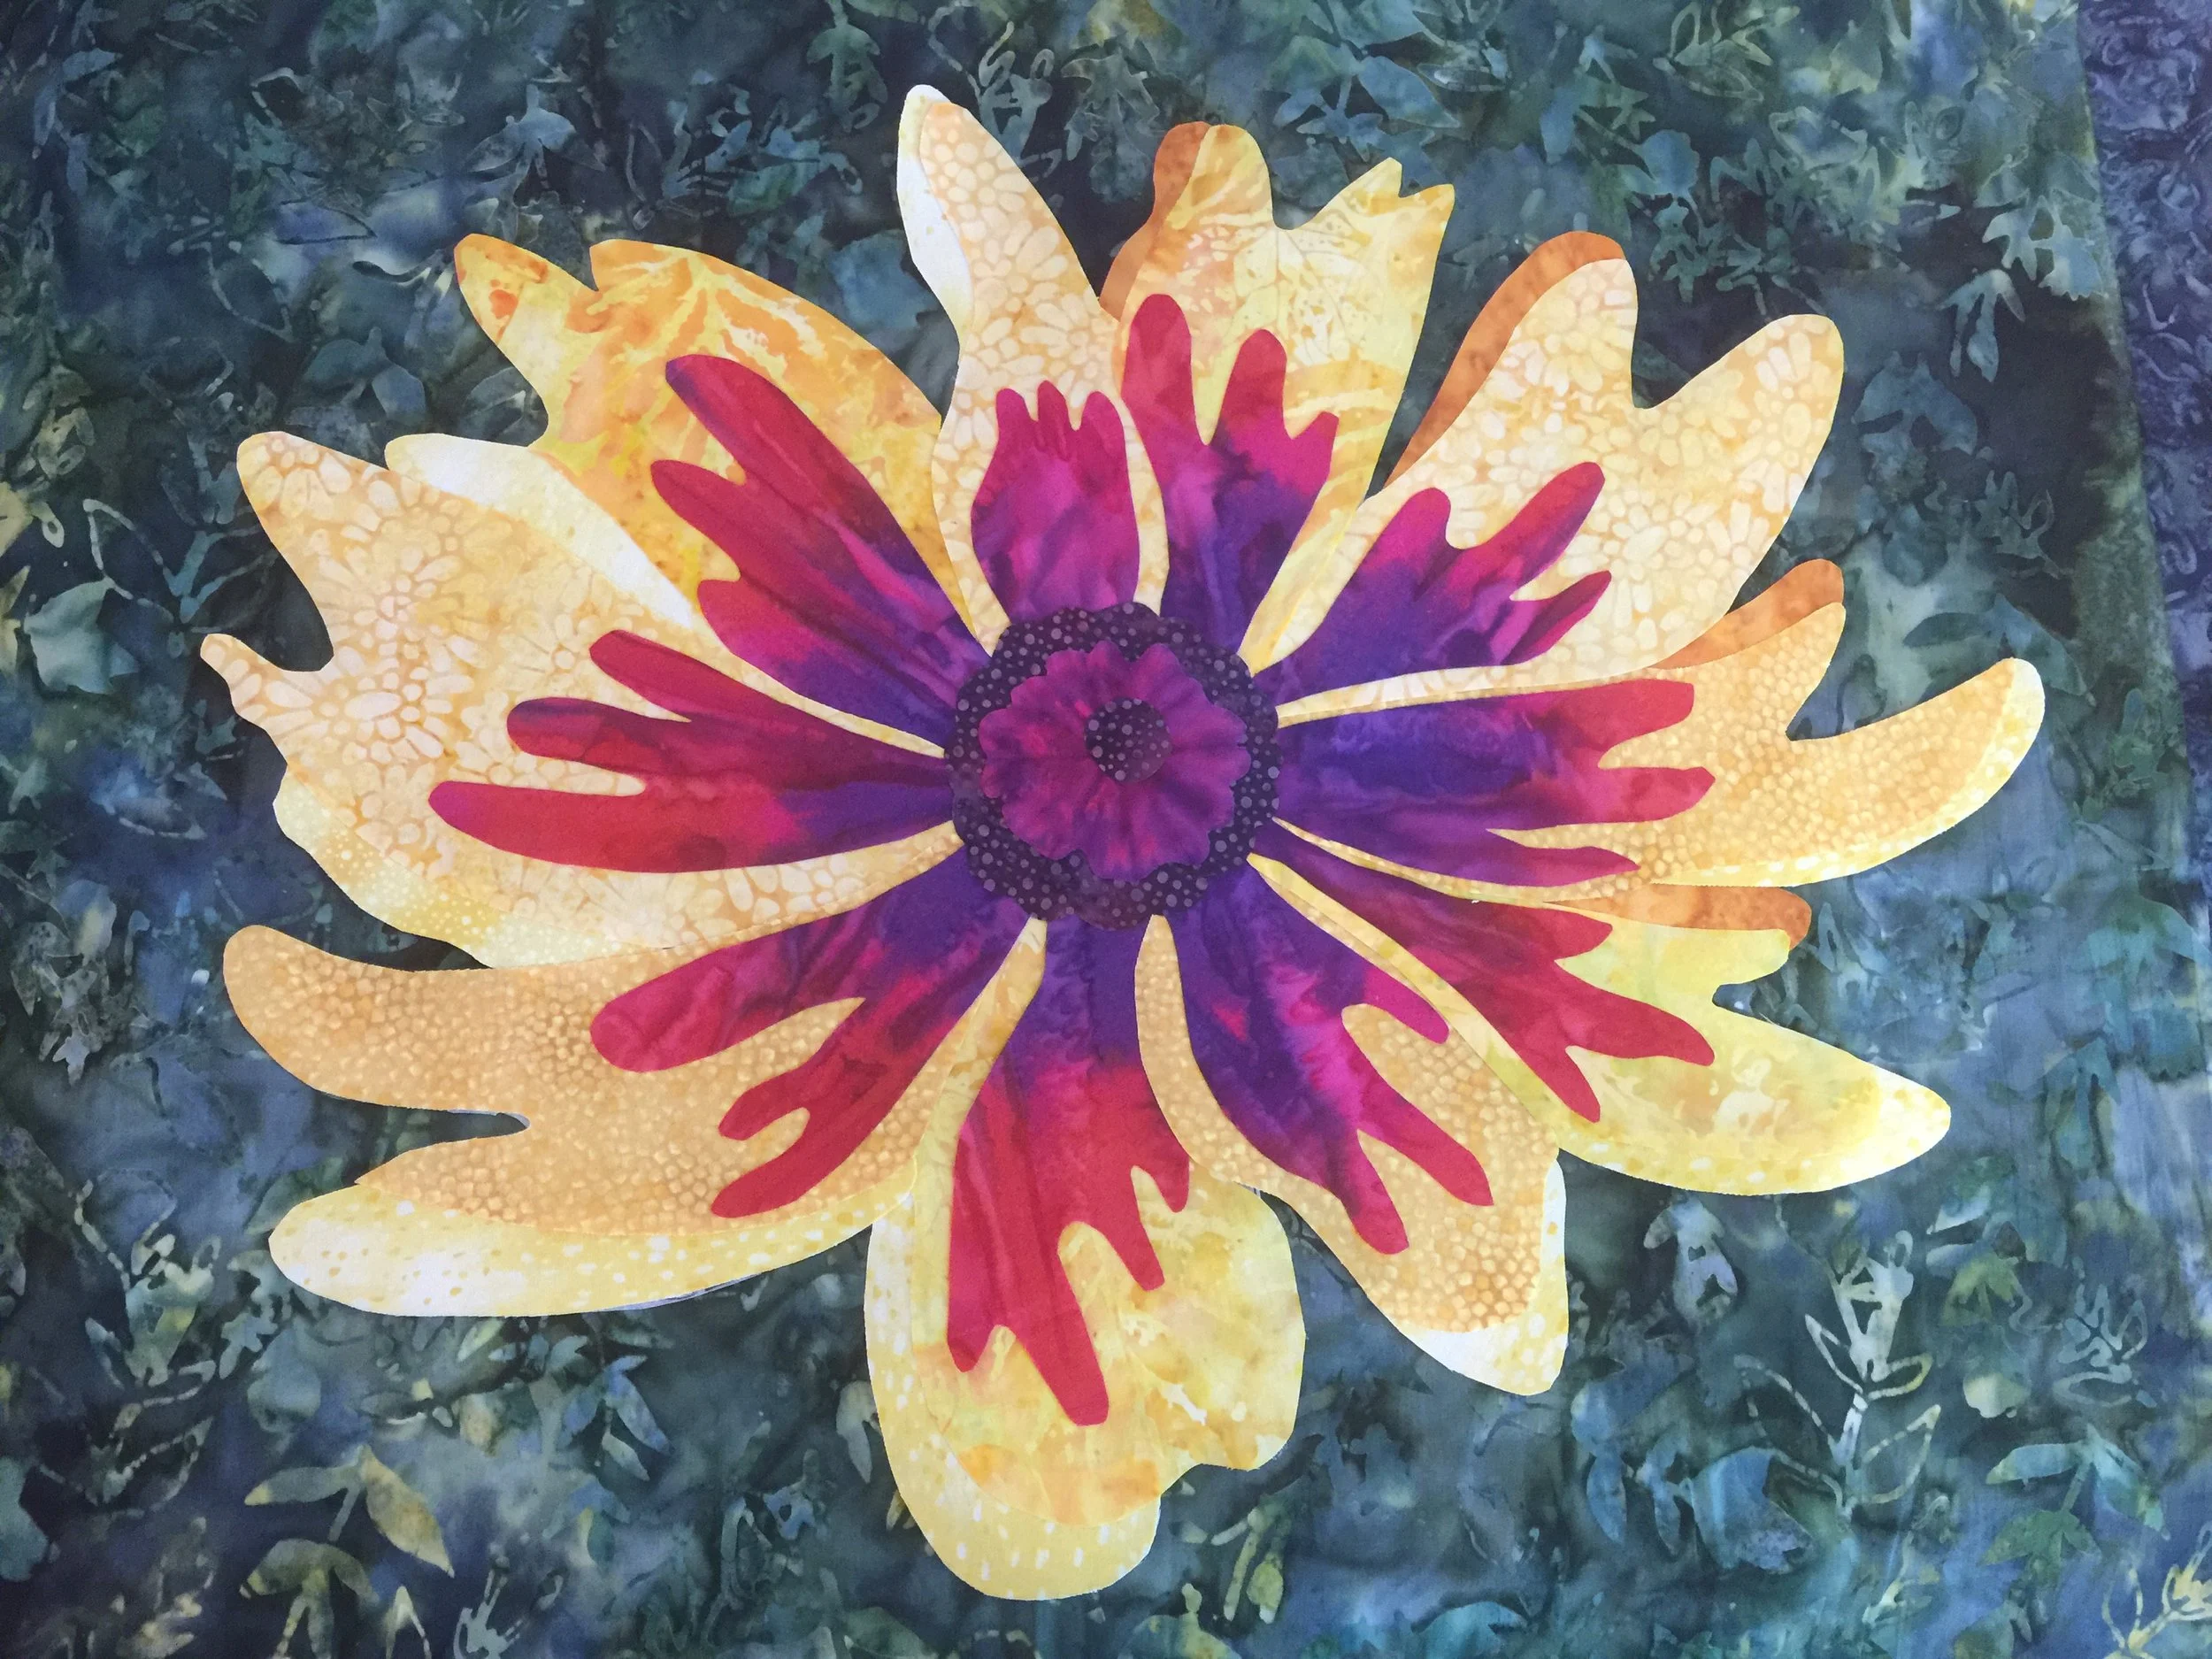
Dazzling Daisy
Designed by Patti Cantu and Jackie Berry
Quilted by Jackie Berry
Made to create a pattern for a workshop
Finished in October, 2021
22.5” width x 18.25” length


Original photo...

Open in Photoshop and posterize at level 4 for drawing pattern.
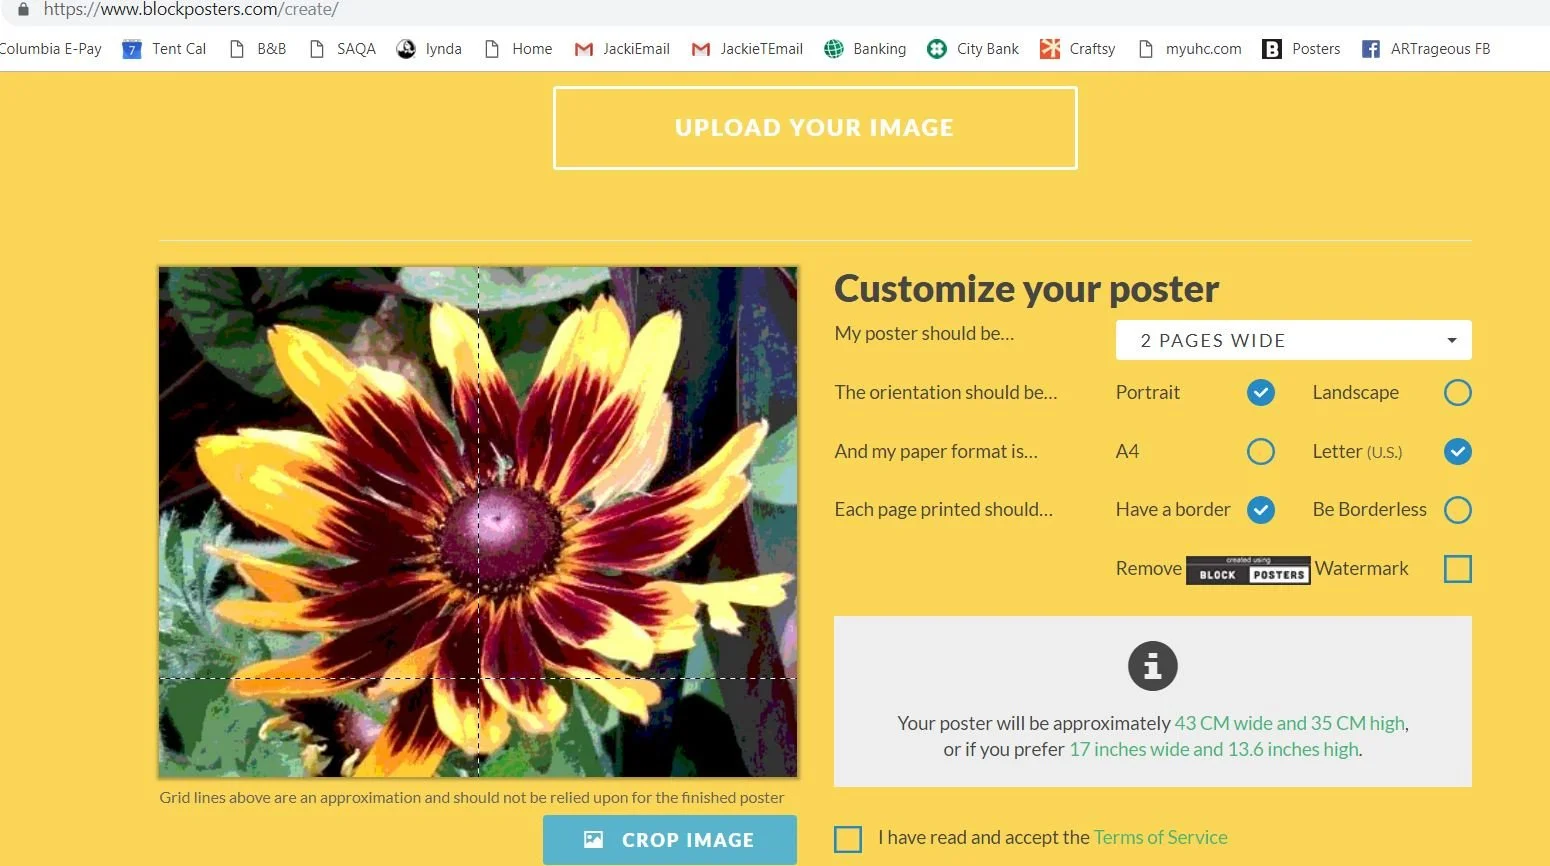
On-line go to Block Poster, and decide on size: 2 pages wide 17 X 13 or
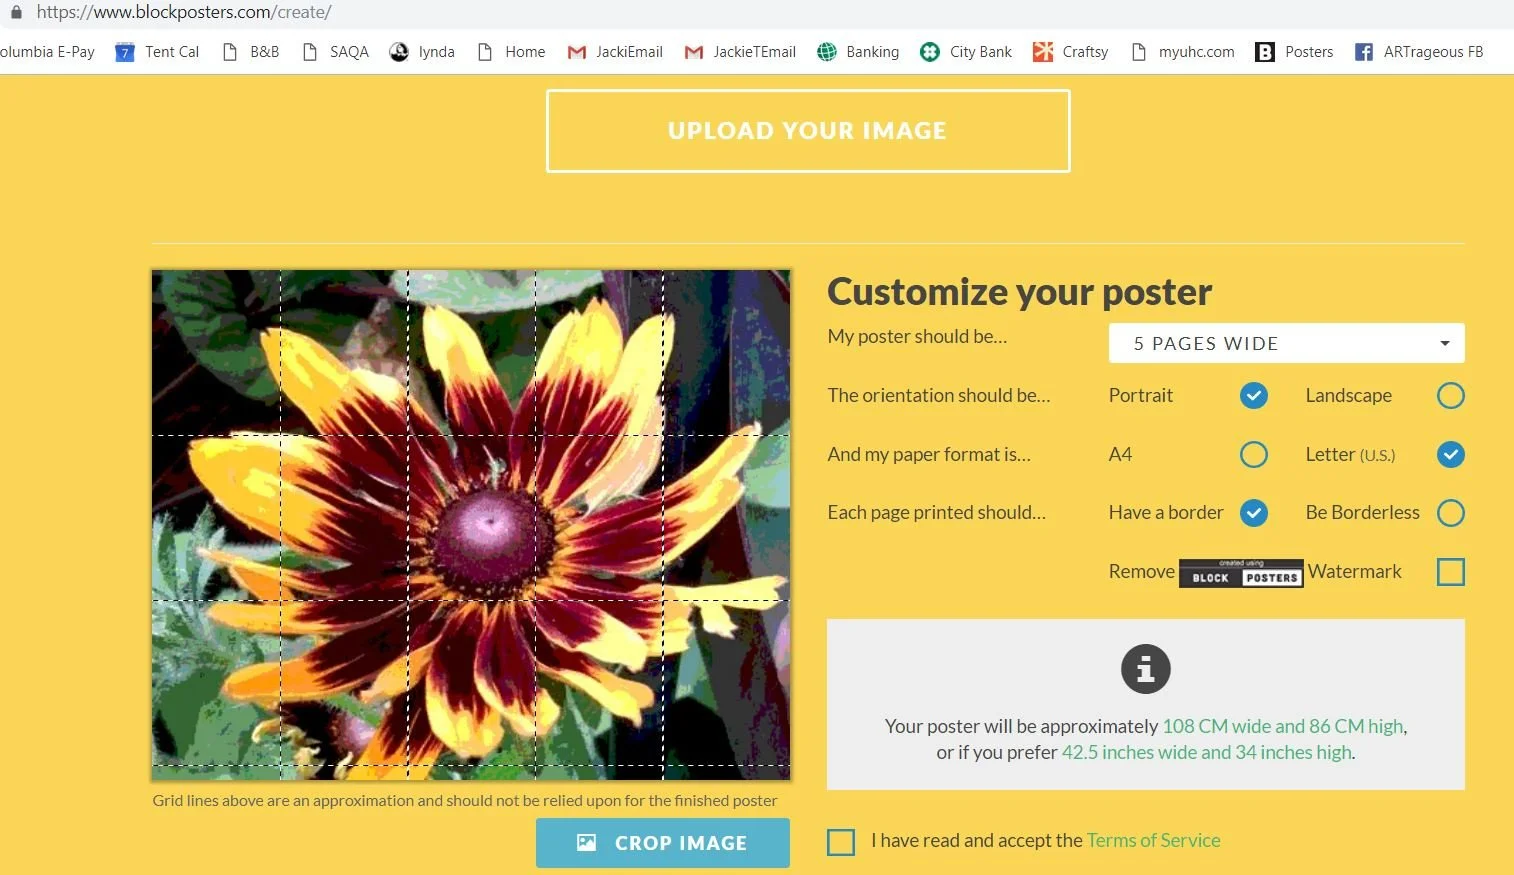
…up to 5 pages or 42” X 34”
Print image, use tracing paper to draw your lines. You can include as much of the detail as you want.
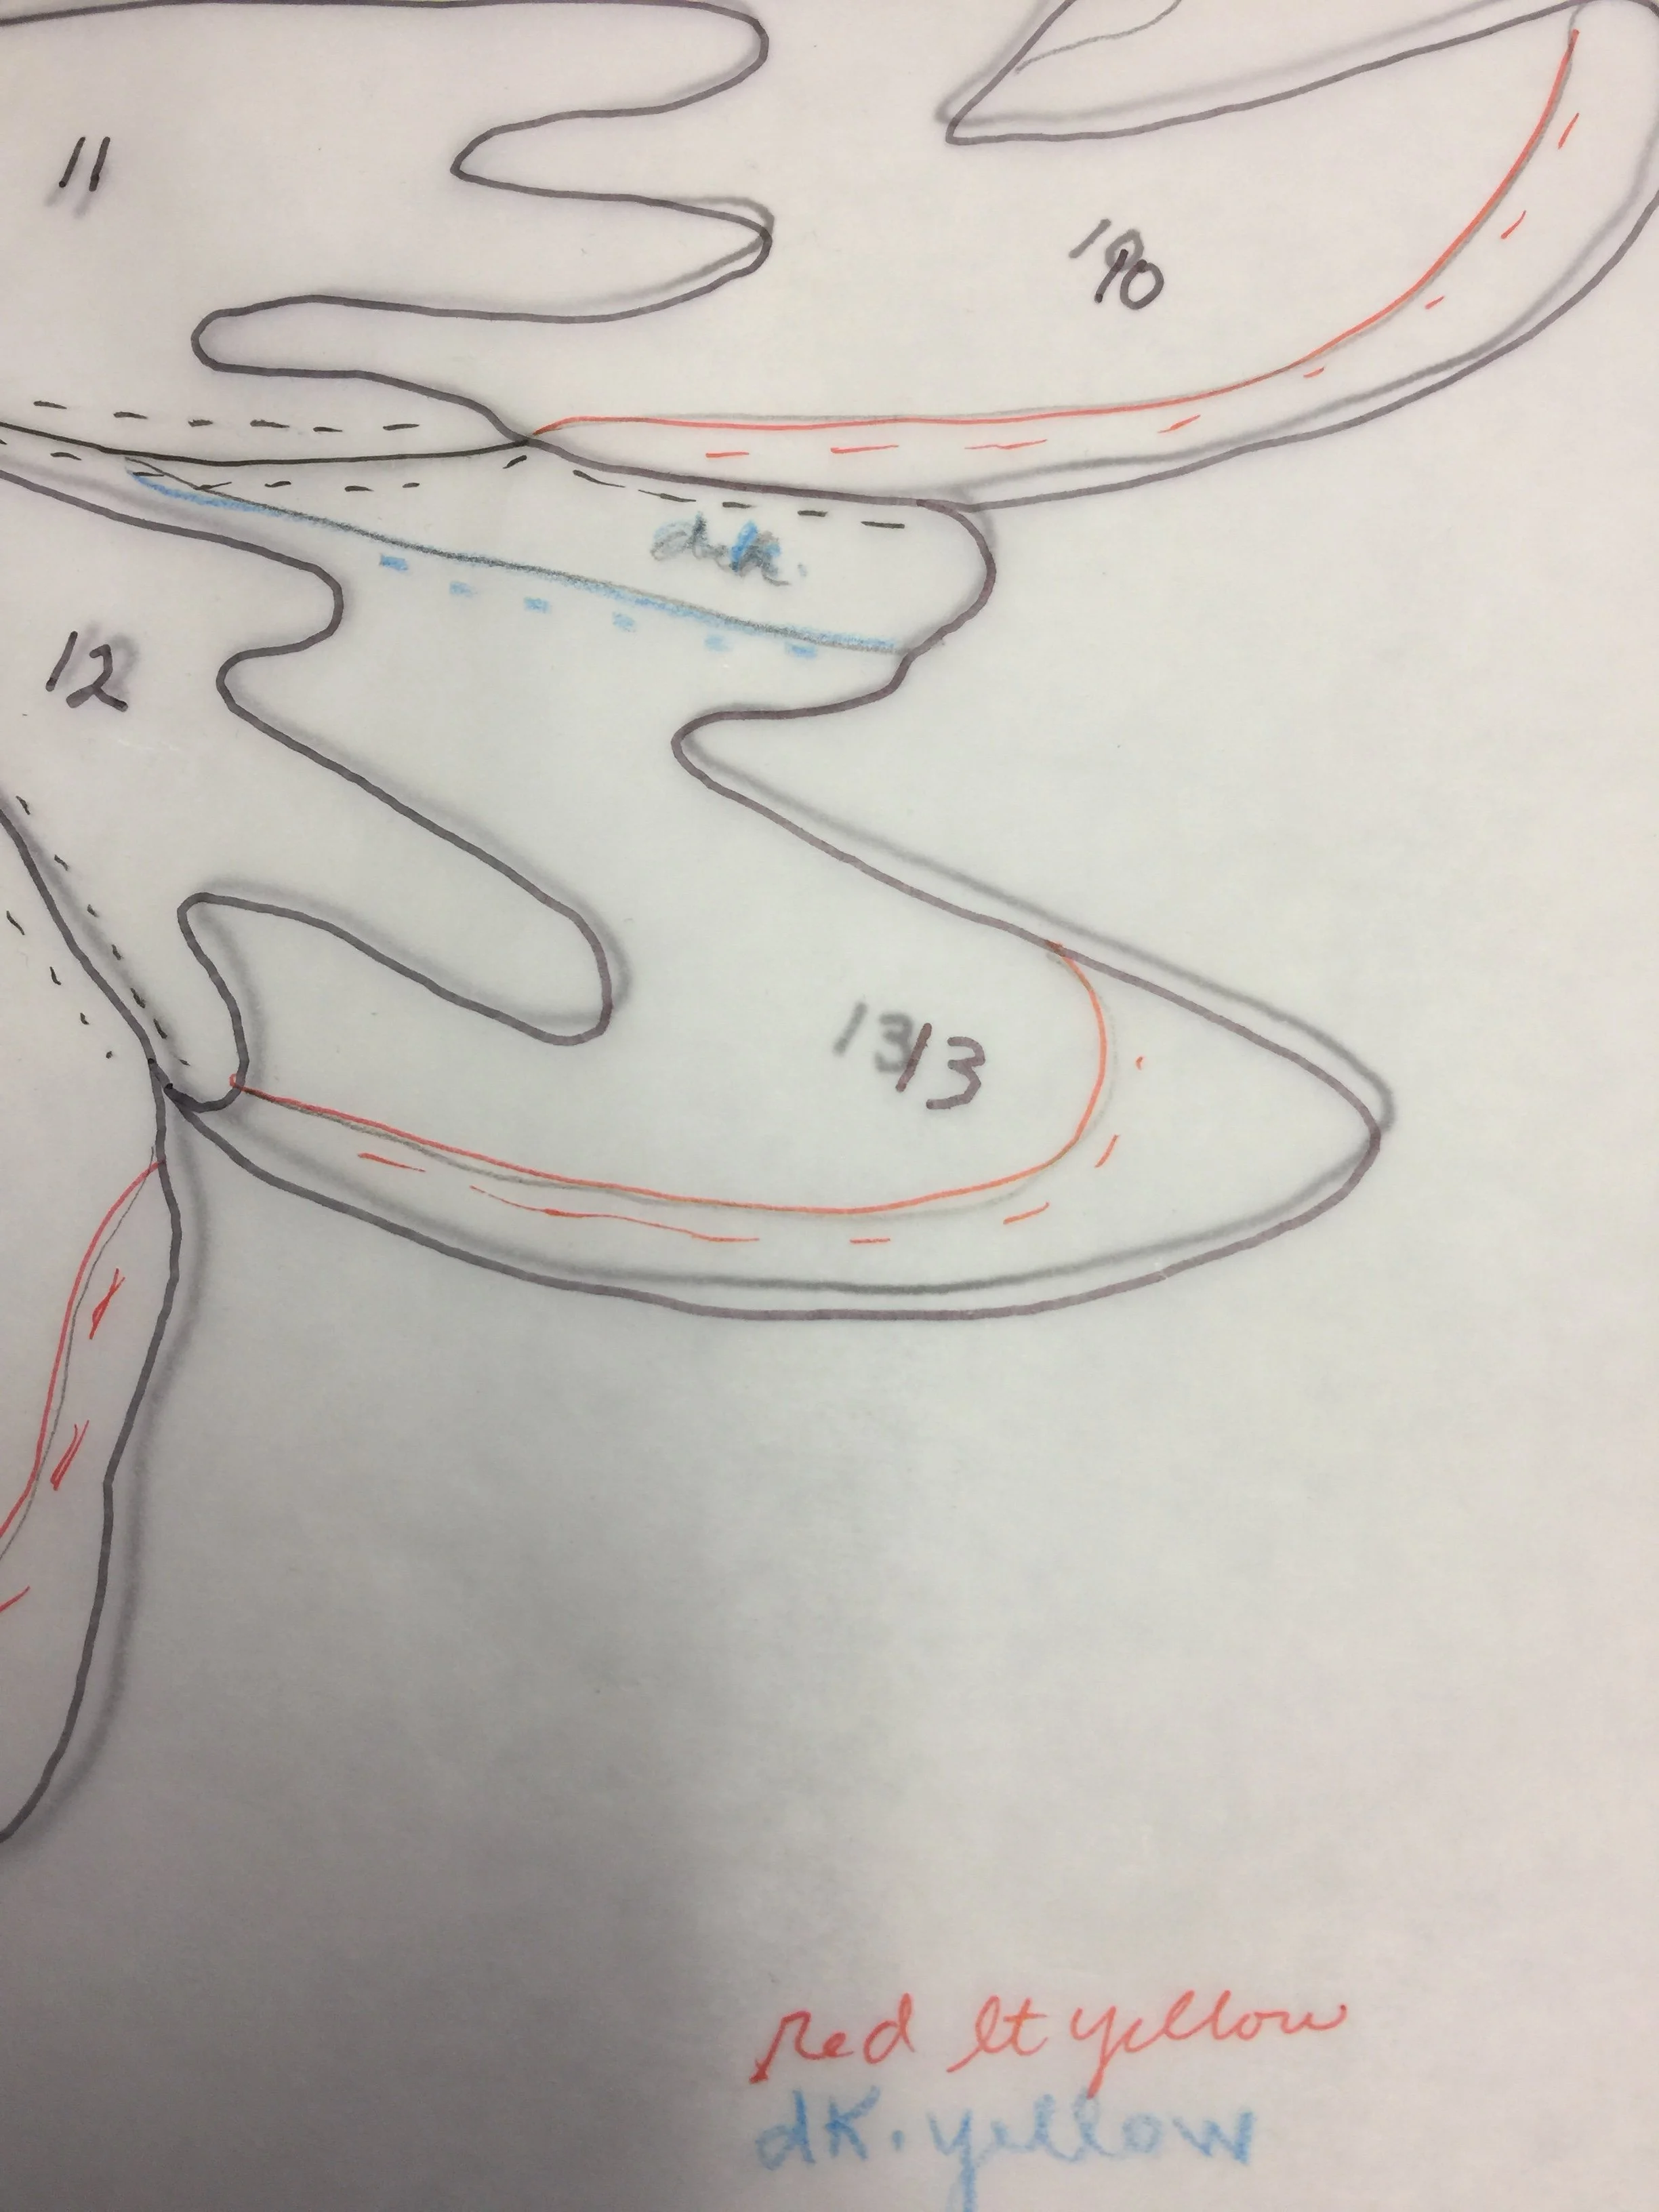
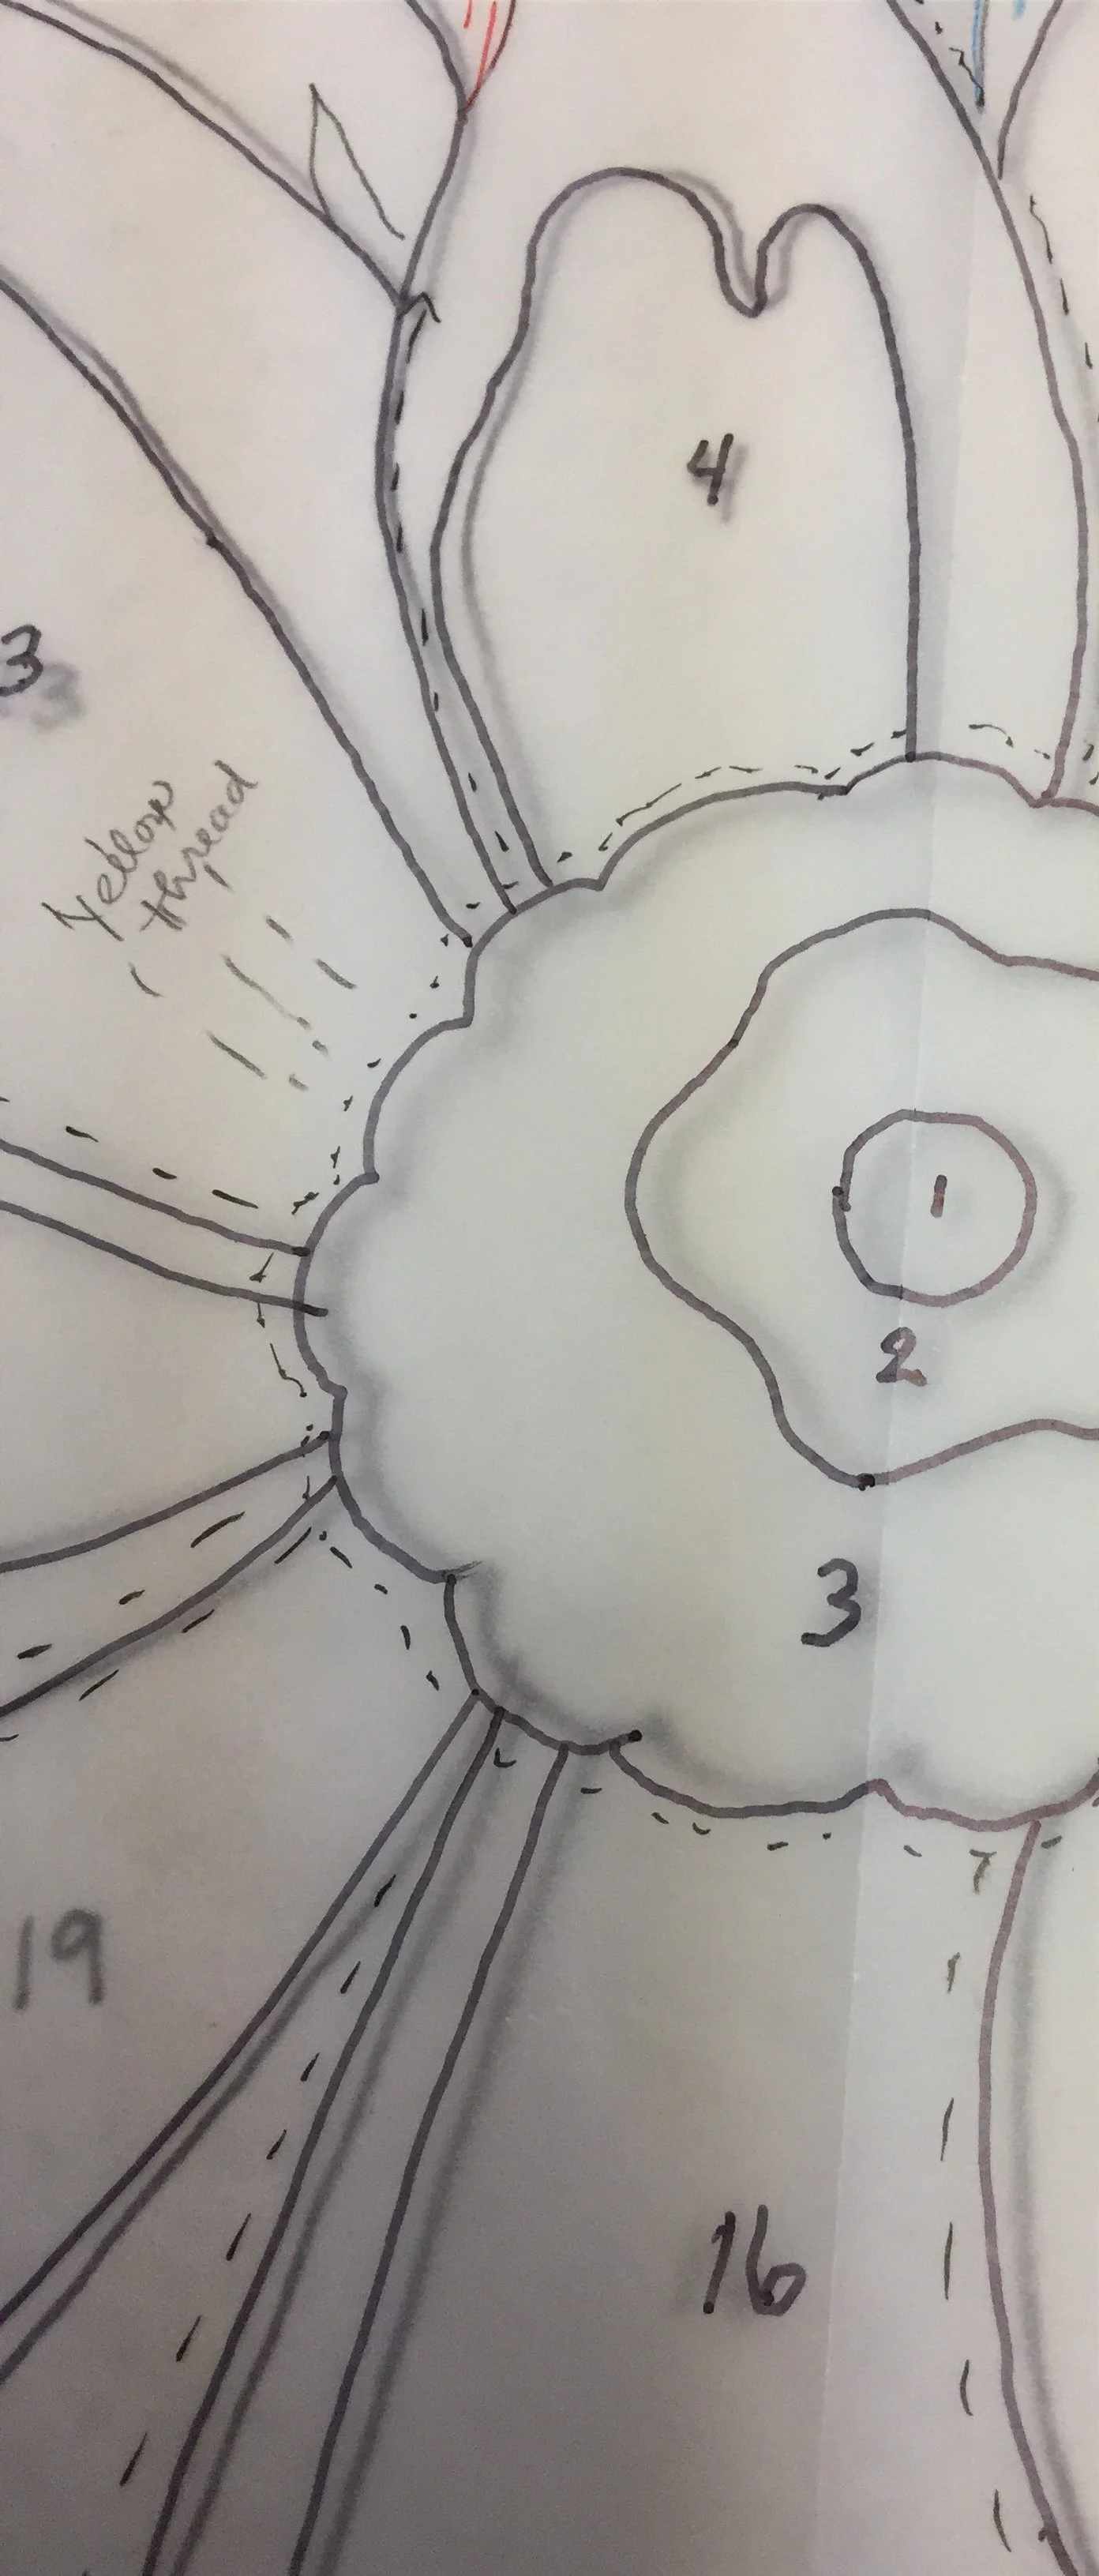
Finalize your pattern. I used dashed lines to show what pieces fit UNDER other pieces. I numbered the pieces in the order they were to be done.
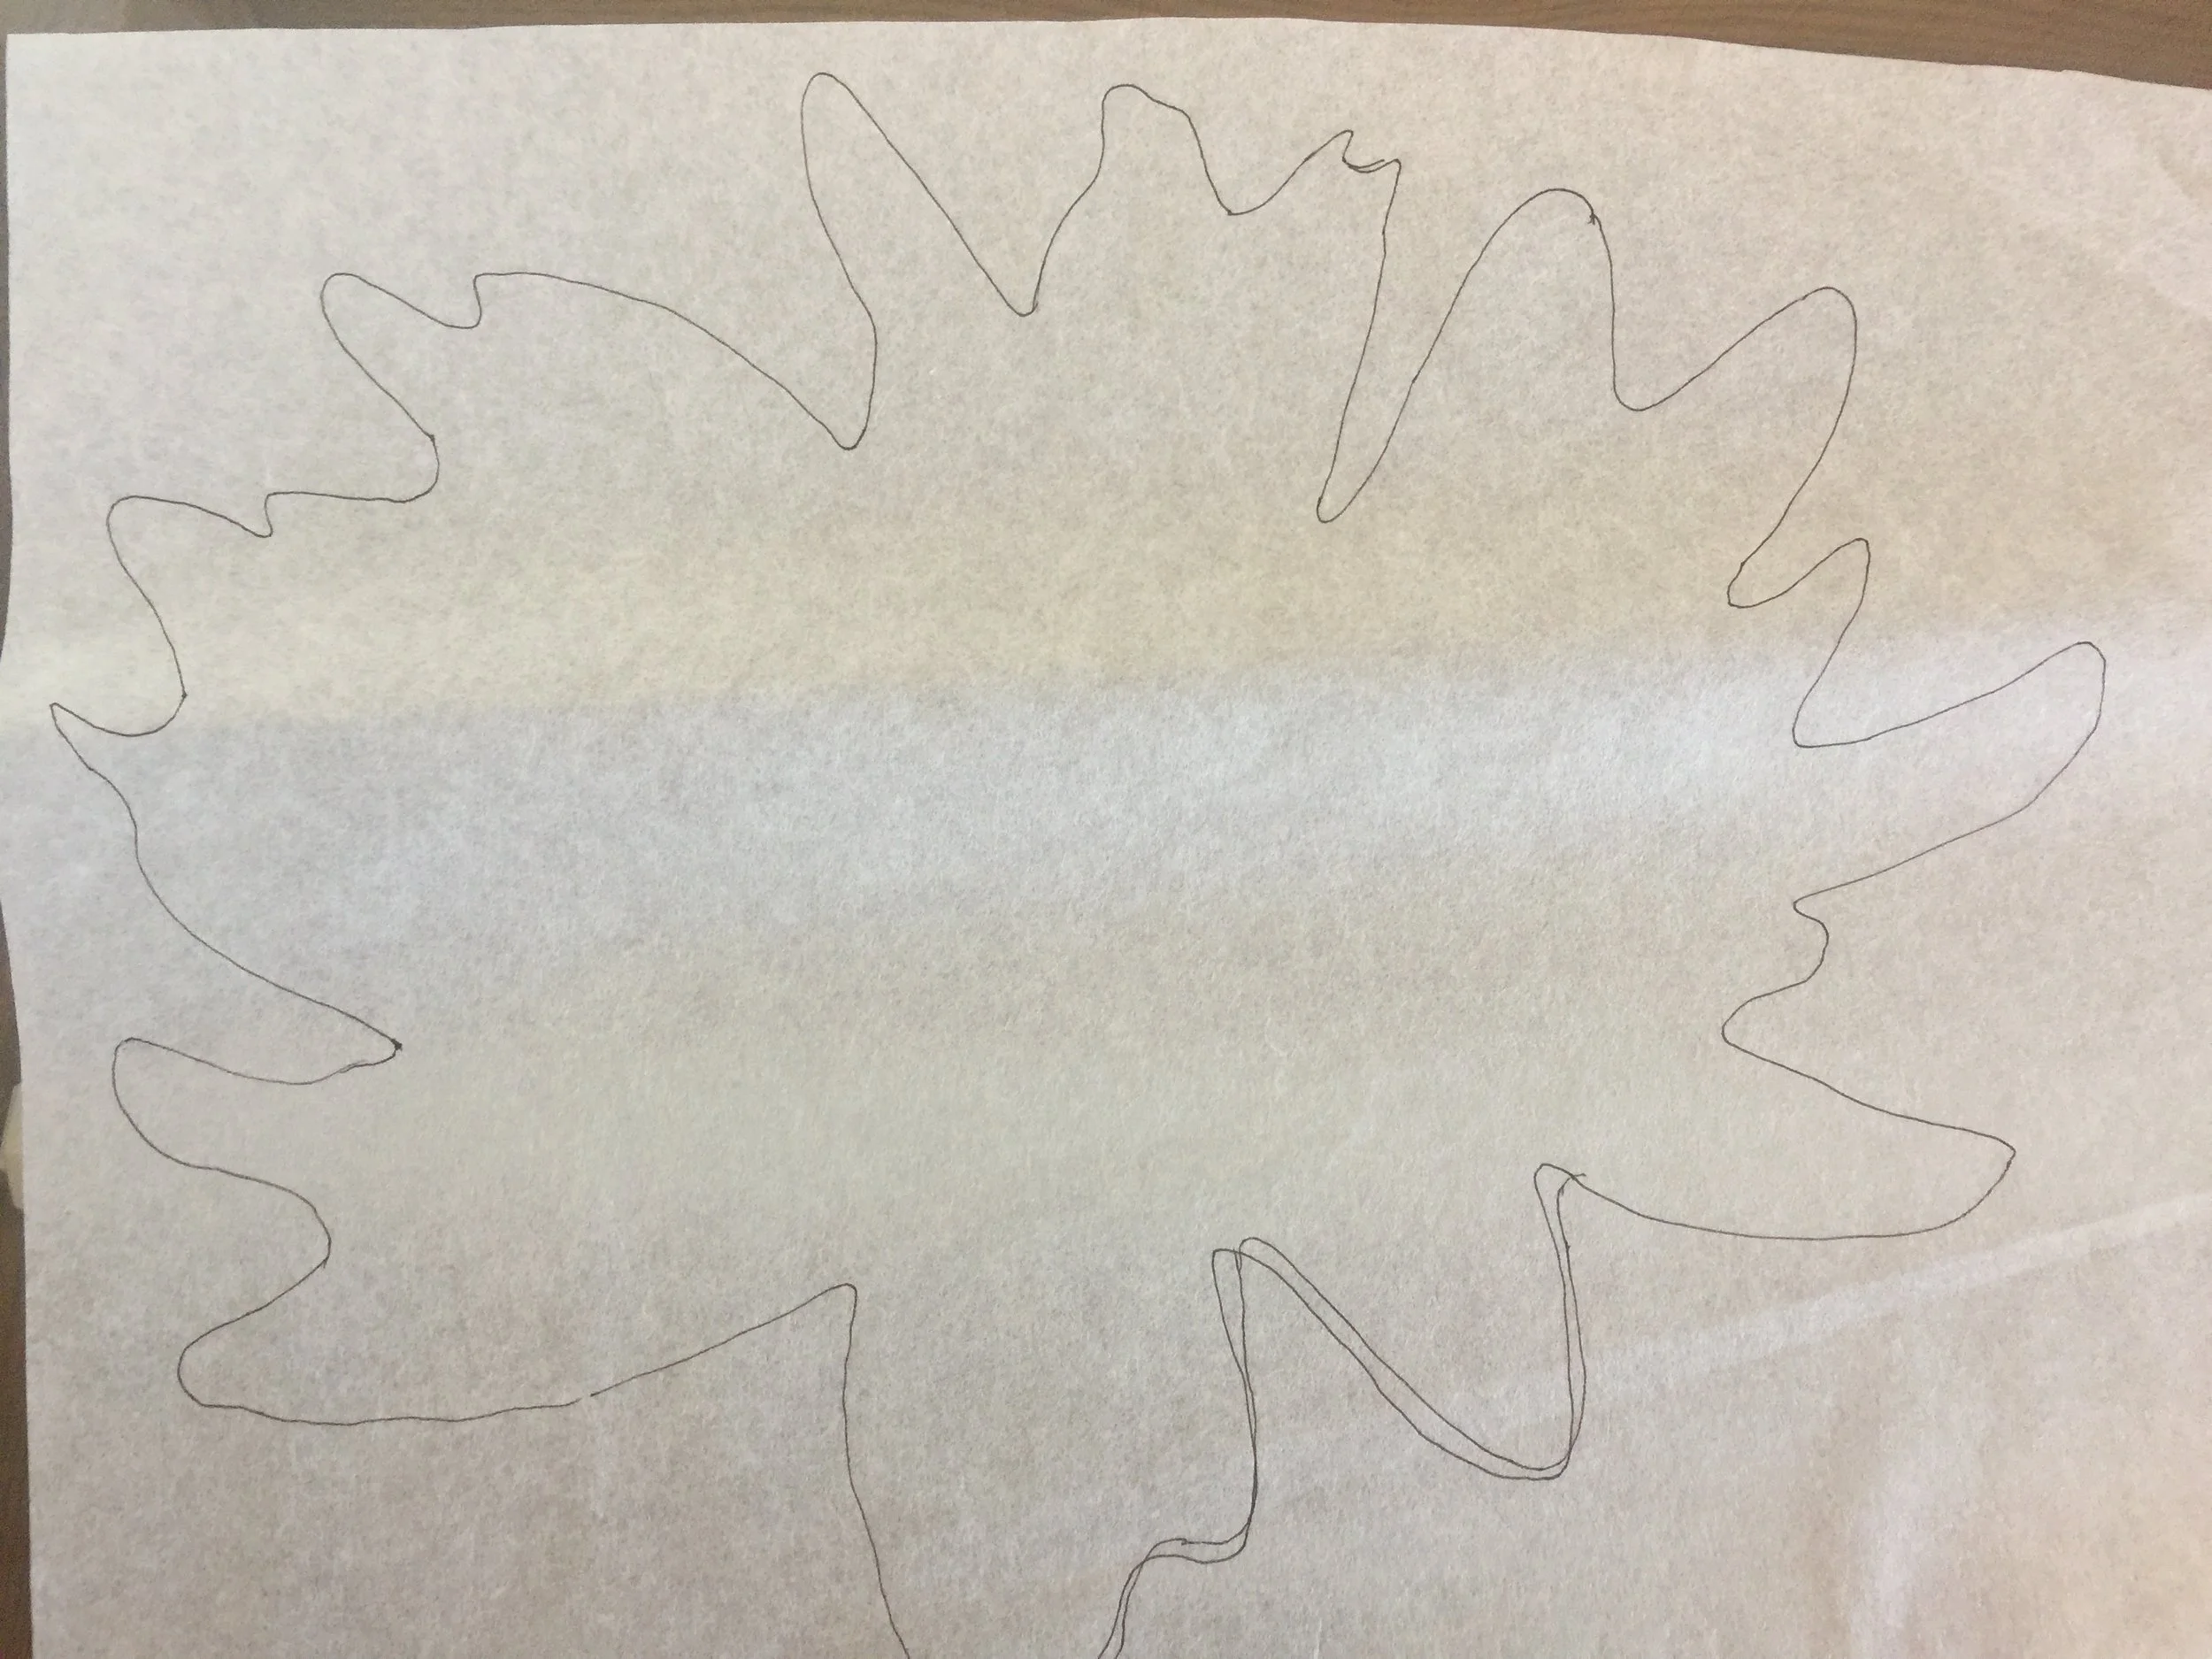
I draw and cut around my image on Pellon 830 on which to build my appliqué…
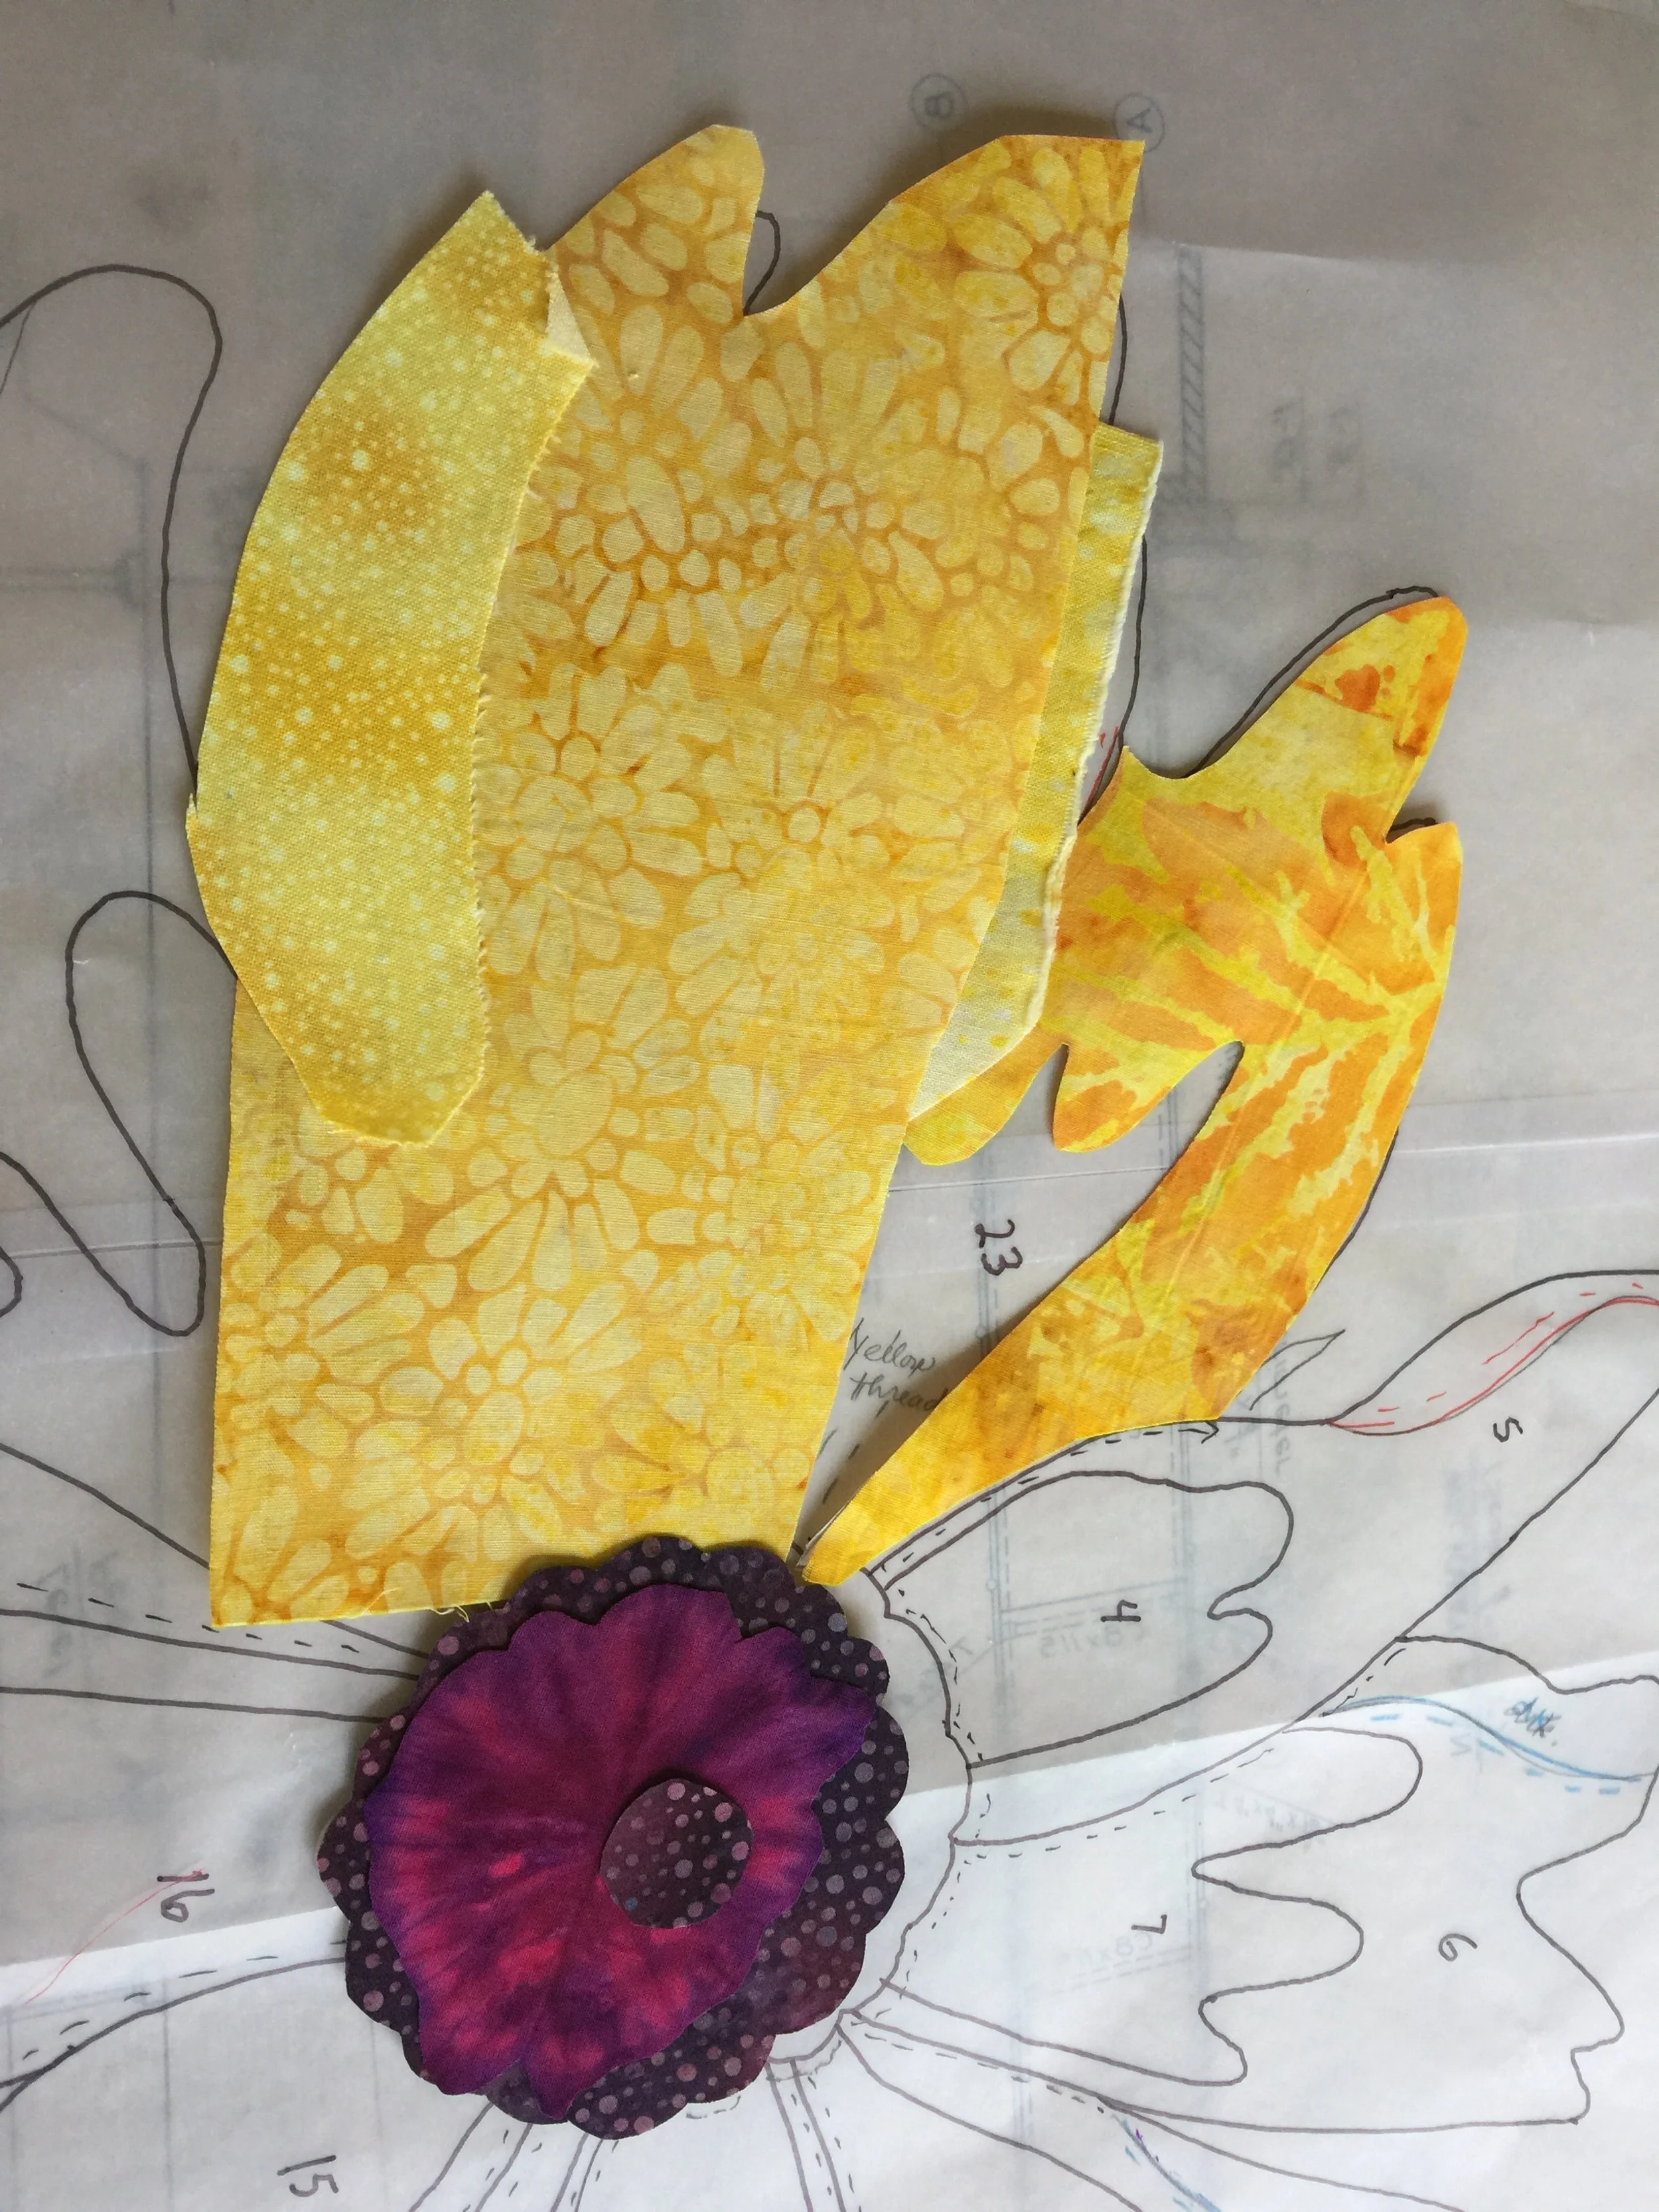
Auditioning fabrics for the flower….

Fussy cutting directional fabric to get darker areas in the center….
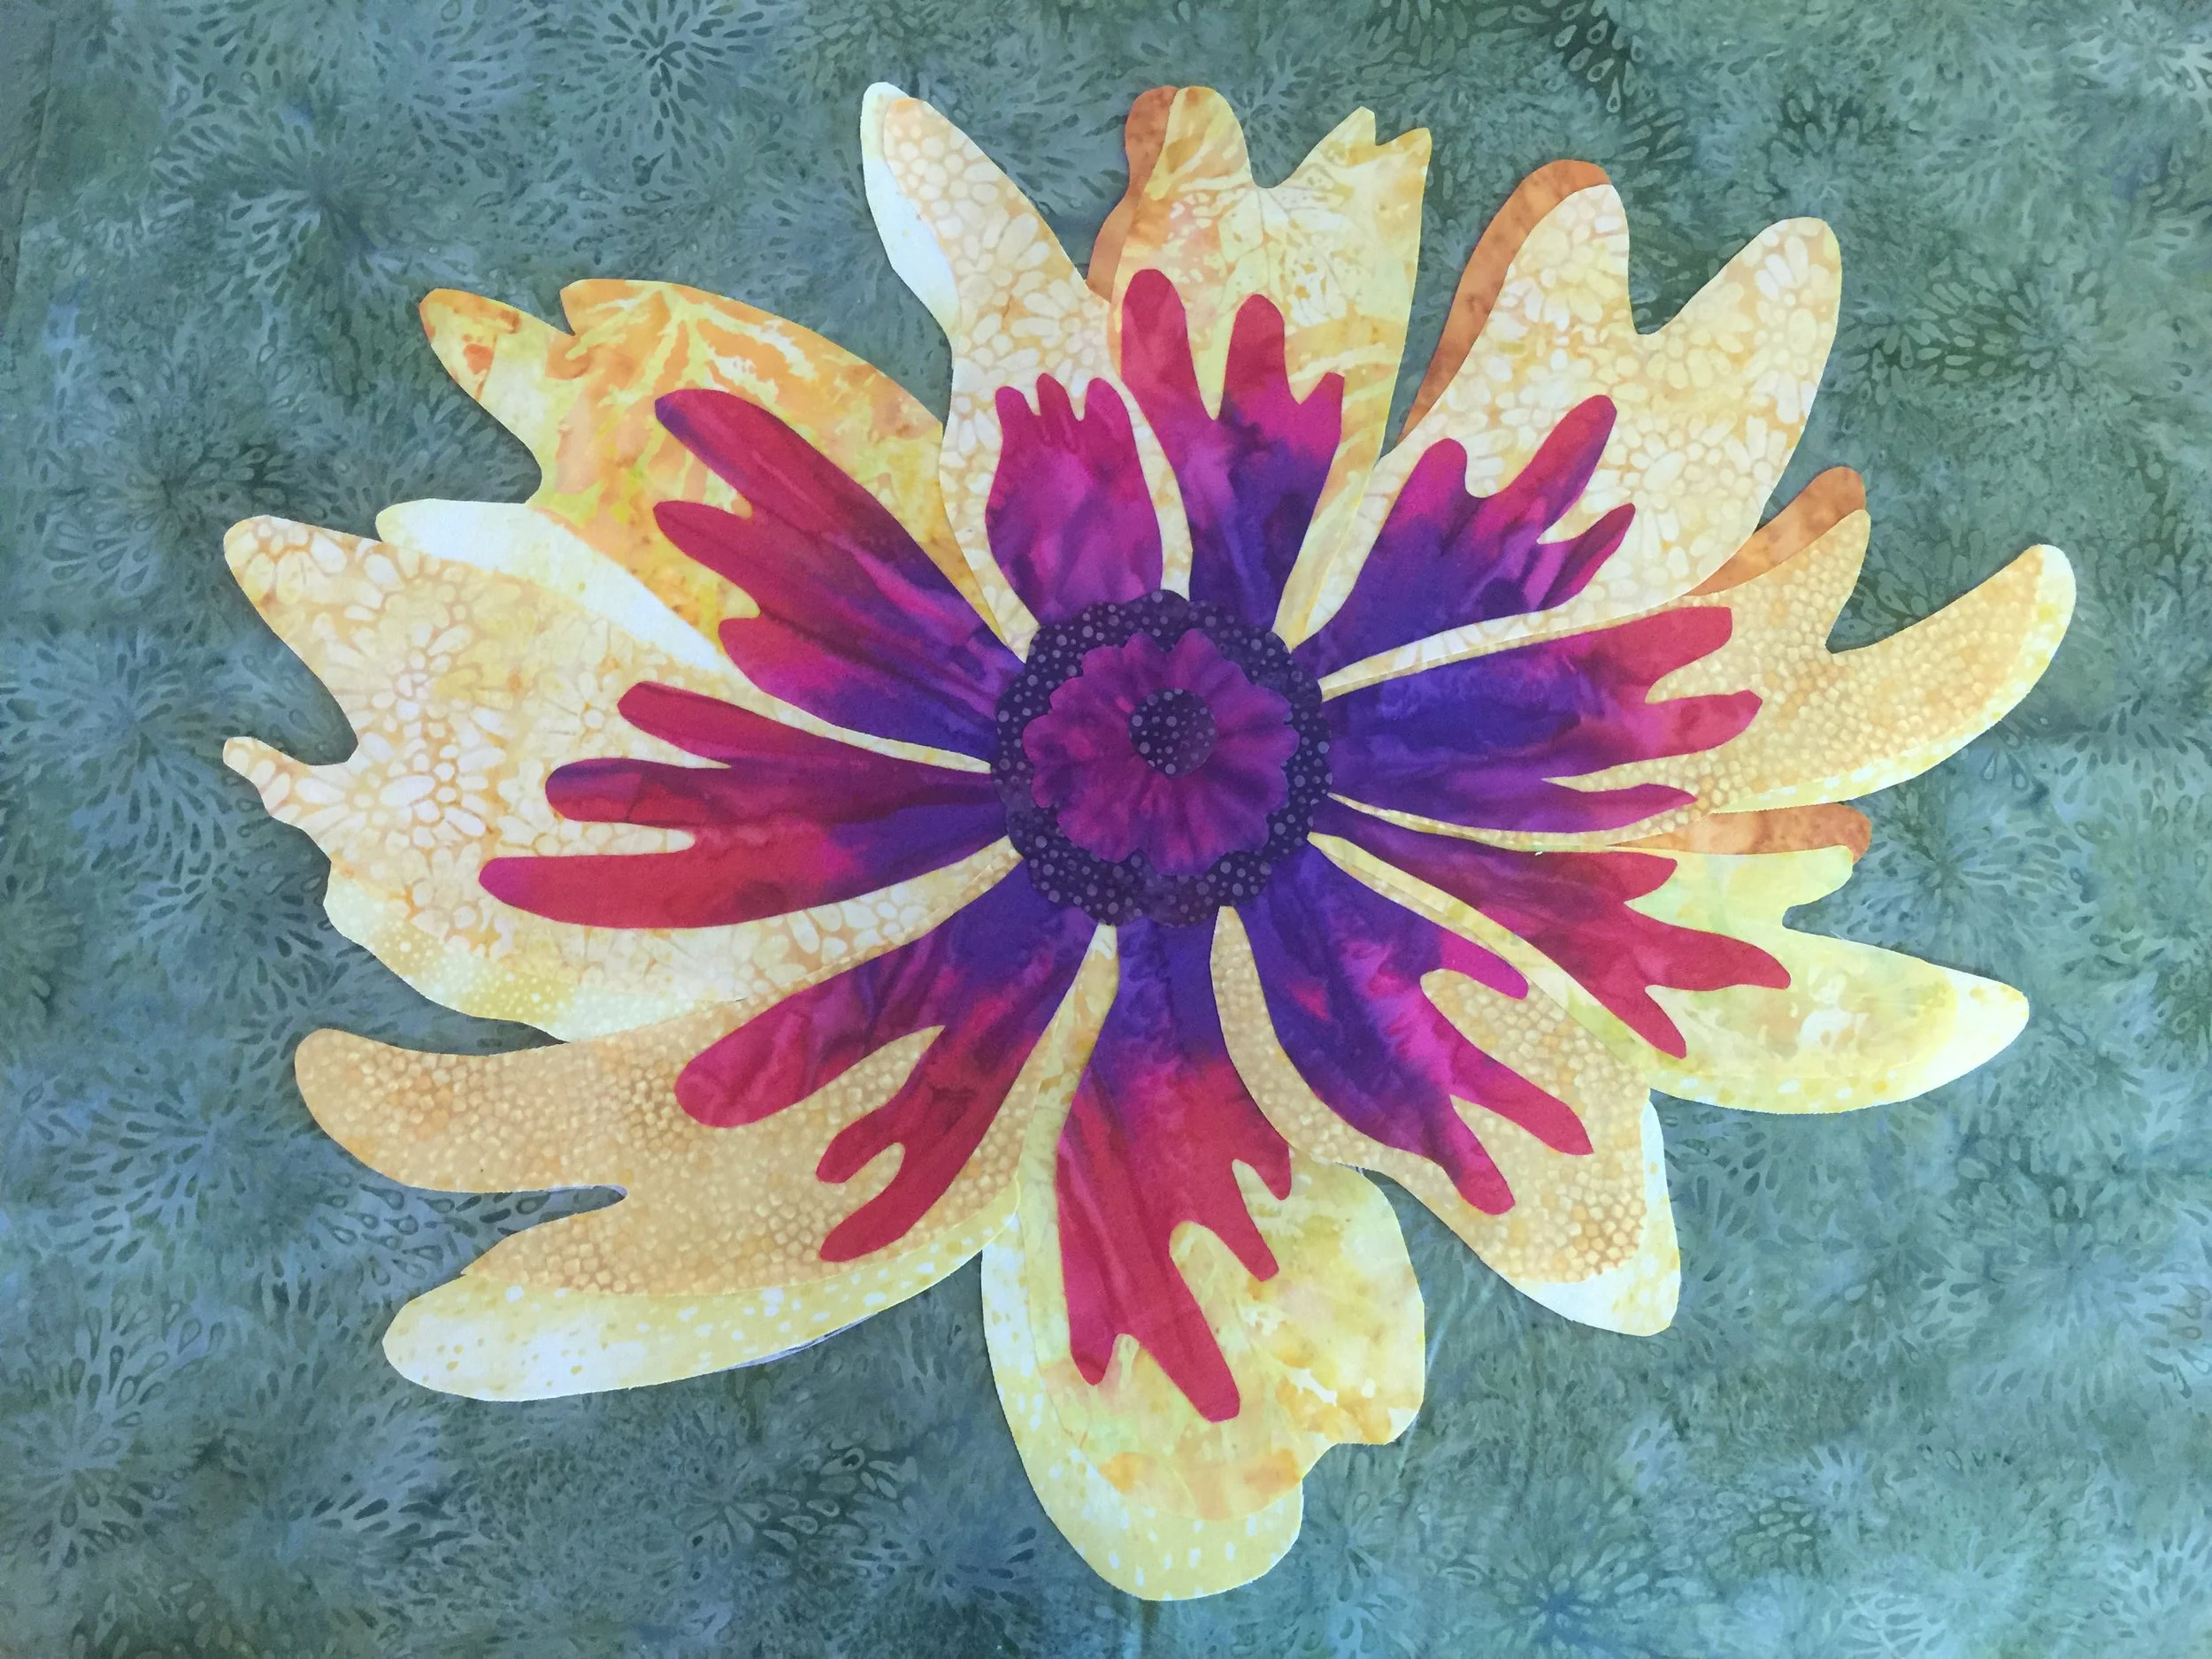
Once flower finished, audition backgrounds… by moving the piece built on 830 pellon.
by moving the piece built on 830 pellon.
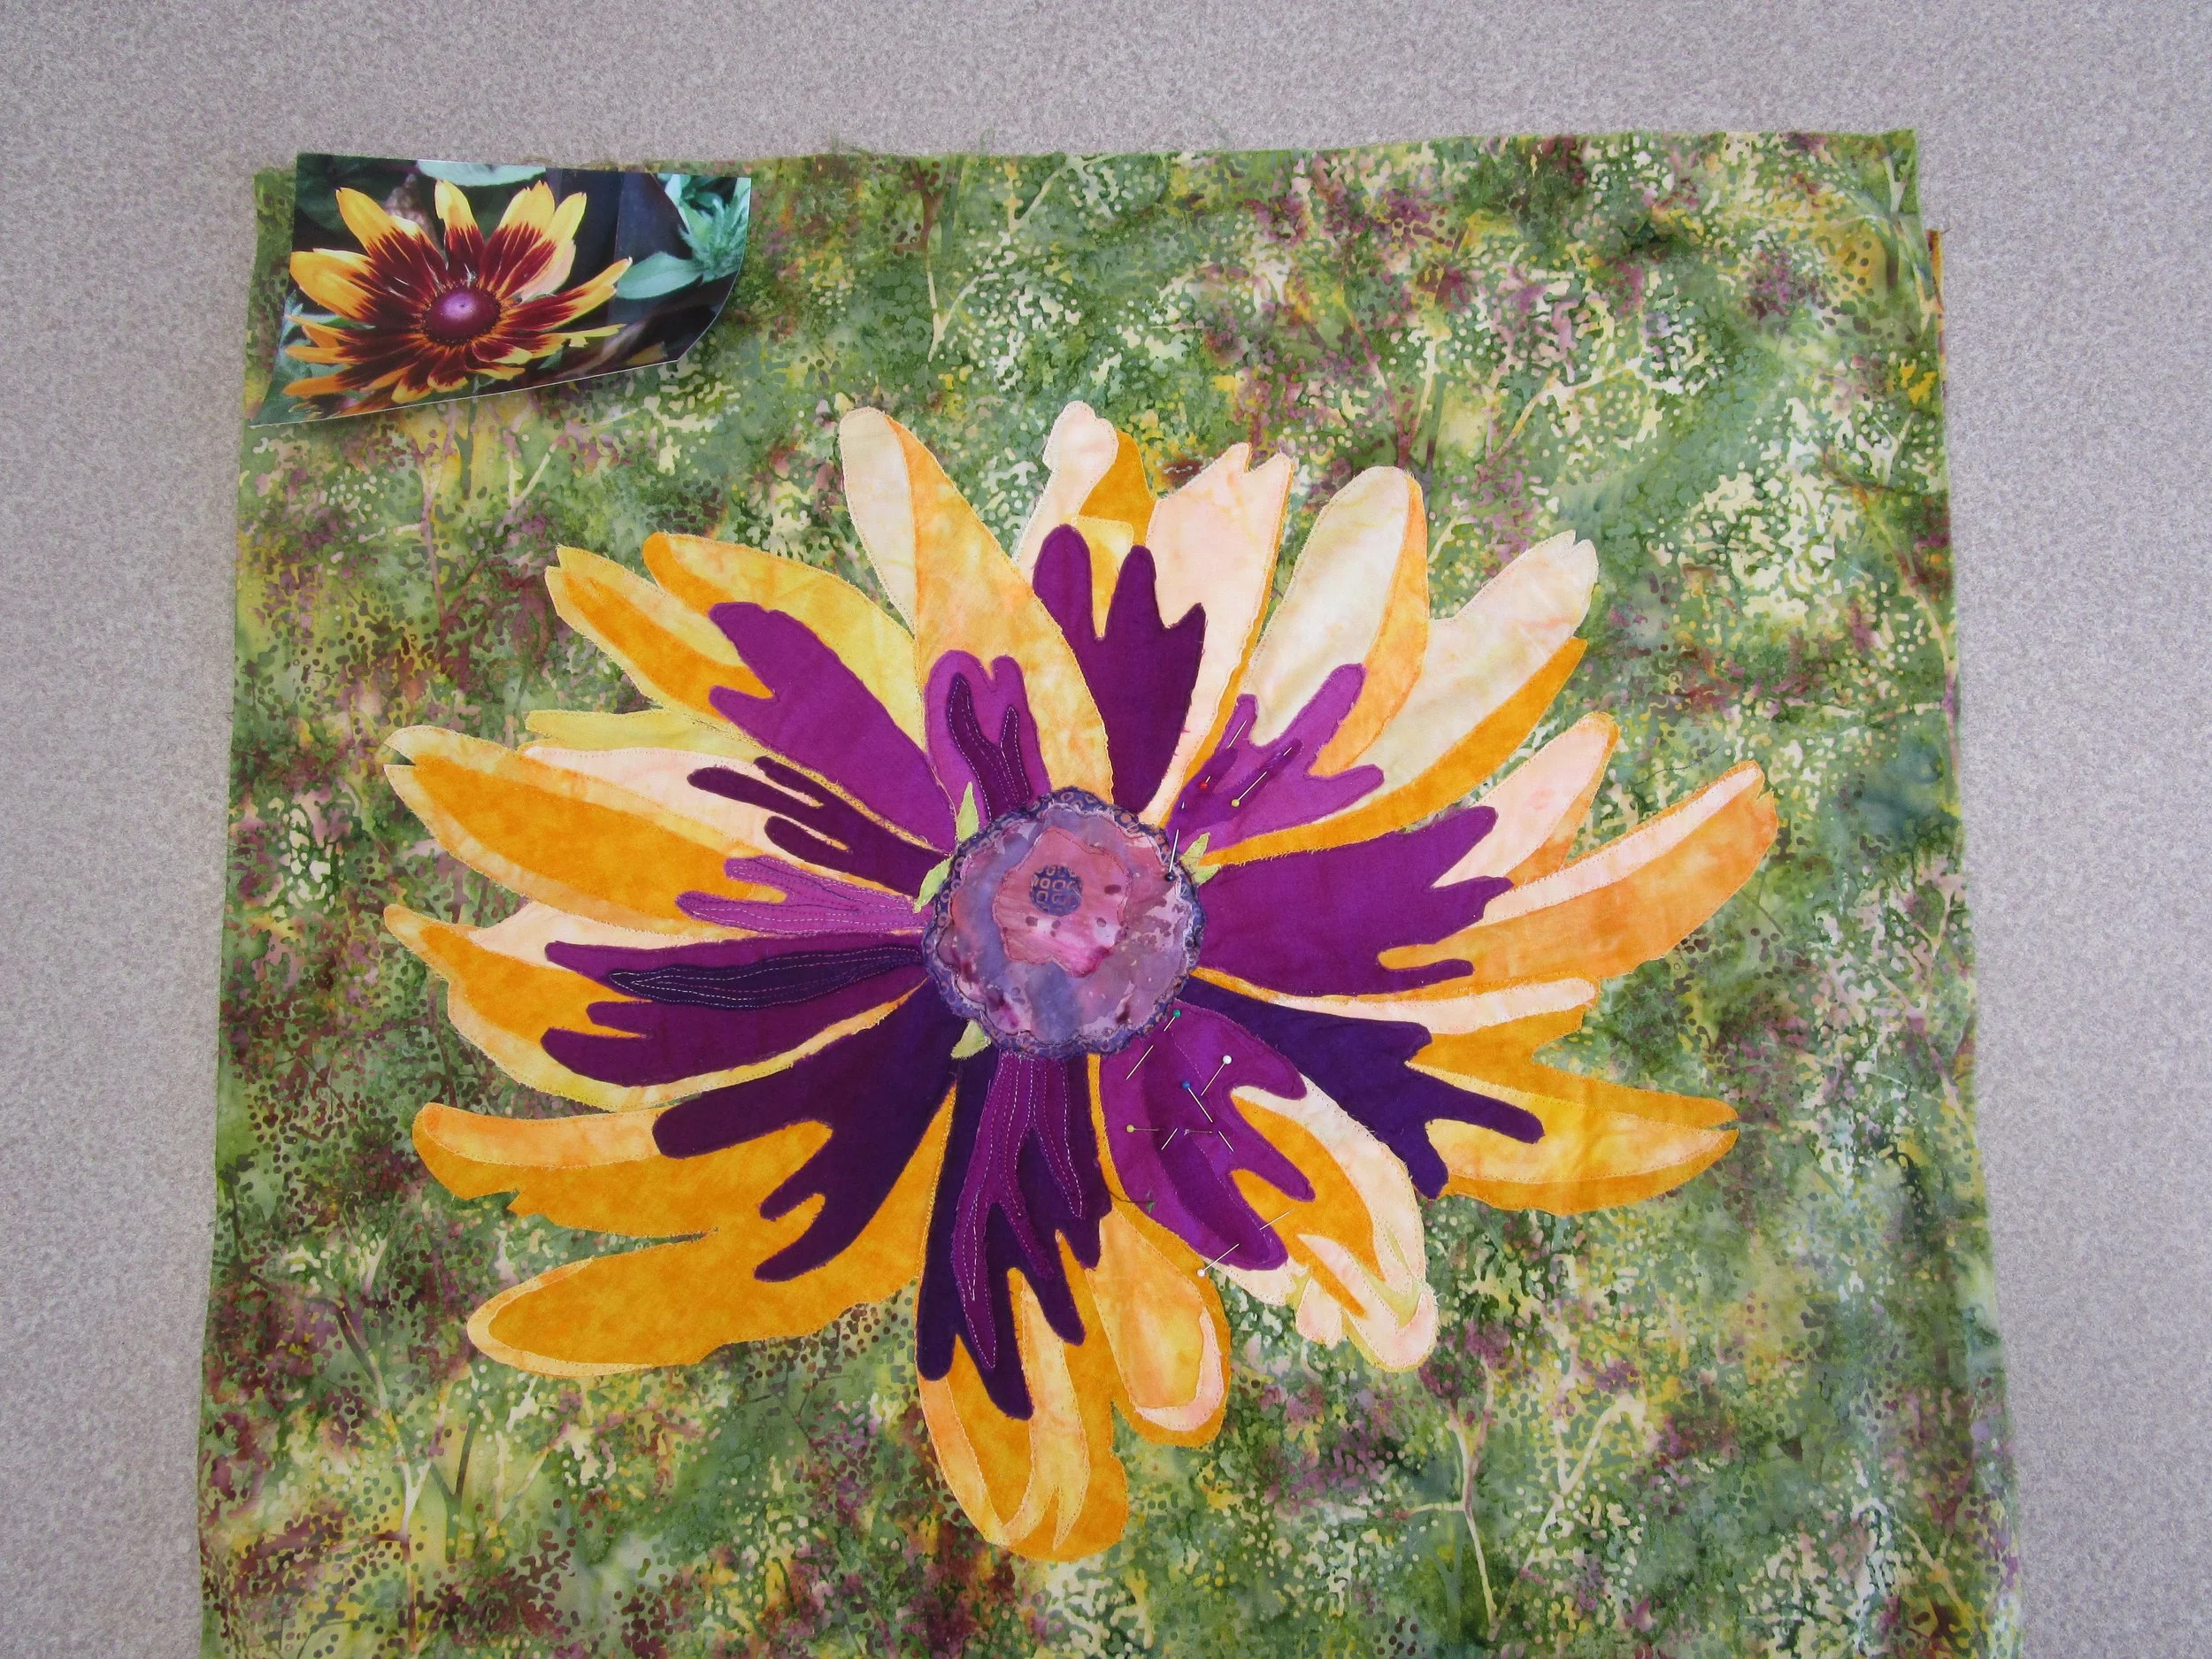
There’s more than one way to do it. My friend uses pins and glue directly on background.

I felt it needed more, so used tracing paper to draw stem and leaf.

And finally another leaf, before free-motion quilting.
Patti Cantu and I have been attending a quilt retreat in Brunswick for several years. The ladies are mostly traditional and asked if we would do a workshop for them at the next retreat in 2017 to make an art wall hanging. One of the ladies had a photo of a flower they decided they wanted to make. So, Patti and I worked together to make a pattern . Our first pattern we felt was too complicated, too many pieces, for them given their experience and the time factor. So, I used https://www.blockposters.com/ to create a photo. I gave them a handout explaining how to use block poster website in the future for their own photos.
Basically, you start by using Photoshop, call up your image, go to adjustment, then posterize. I change my images with different "numbers" and decide which has the amount of details that I want to use. Save each file with the number of levels you've chosen, so you can study, or pick one on-line and save it. I used posterize level 6. It gave it depth, but wasn't too complicated for the beginner or time allowed.
Then go to www.blockposters.com. You upload your picture. It takes a second.
Then you make choices of how big you want it. You can have 1 page up to 5 pages free. More than that you have to pay. One page (for this picture) was a 6 x 8. Two pages turned out to be a 17 X 13. This is what I chose for the ladies. Five pages goes up to 42 X 34. You can switch back and forth easily to see which you want. In addition to printing your photo, save it for the future, in case you lose, change your mind, or mess up. Then trim one side of each page, so you can butt it up close, and tape together on back side.
Once you have the image printed, you can use tracing paper to draw the lines you want. You can change the image any way you want, include as much of the detail as you want. Then you need to use the system that works best for you to finalize your pattern. On this one, I used dashed lines to show what pieces fit UNDER other pieces. I decided where to start on the pattern. I numbered the pieces in the order they were to be done. In this case, they were to start with the highest number down first, working toward 1, the last piece.
We gave them copies of the pattern and they were to trace their pattern onto the vinyl we gave them. The dotted lines represents the part of the pattern that needs to be cut ¼” larger than the solid line. This piece was to go UNDER the other piece. These are sometimes called “undies.” TIP: Usually, the lightest value goes under the other fabric piece, so that the dark fabric doesn’t show through. Then we had them use fusible to cut out the patterns. We discussed using freezer paper if they chose to in the future. We discussed there are several ways to build your, in this case, flower. You can build on your chosen background, or as we demonstrated, you can build on muslin, or tracing cloth 830 Easy Pattern Pellon, and then audition various backgrounds after it’s completed. You move your piece on top of one fabric after another until you like the effect.