
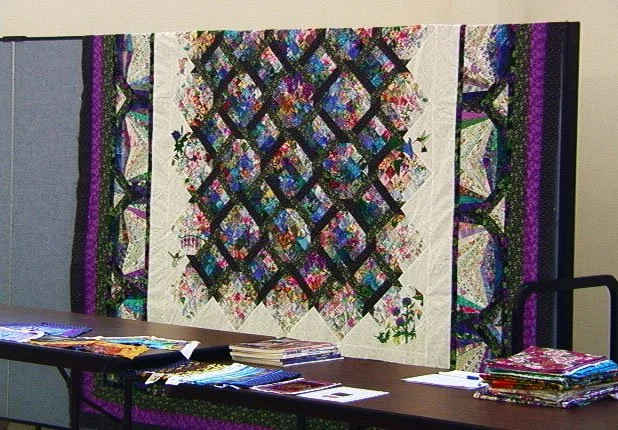
Hummingbird Colorwash
Designed and quilted by Jackie Berry
Made as a sample for a Colorwash workshop presentation
Finished in October, 2021
19” width x 19.5” length

I did a colorwash Workshop and Presentation in 2005.

and needed a sample and pictures to show them the different steps for a colorwash quilt for the handout.

I start sewing the squares vertically….

and do not cut the threads, but sew the next set of 2 blocks to the end of the row.
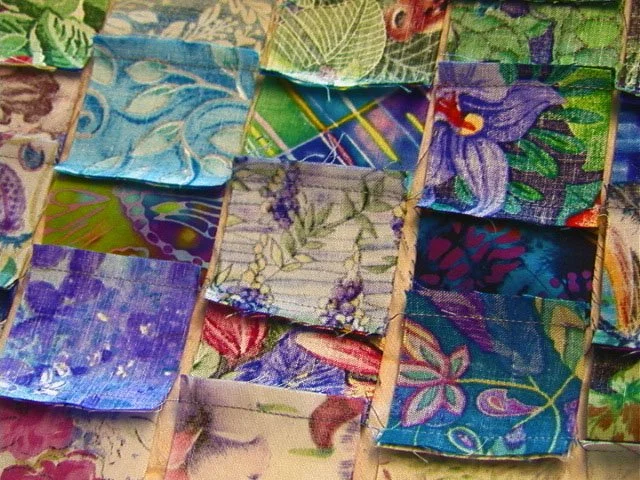
Each time, you iron the seams just opposite of the row to the left. This makes it easy to match your seams and they’ll lay flat when sewn horizontally.
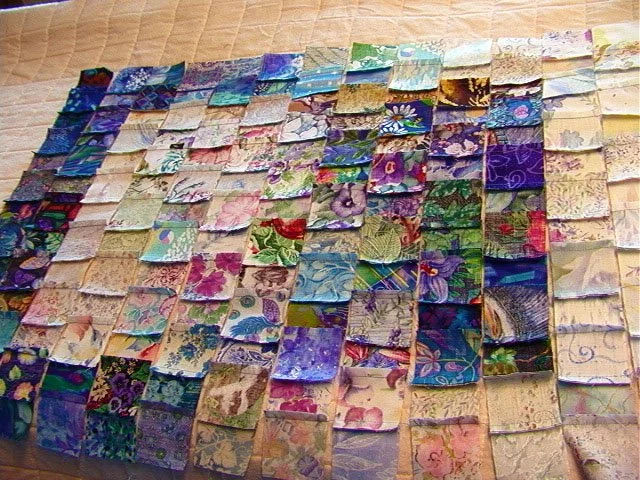
You will have your design all attached with your threads, to keep them in order, ready to sew hortizontally.

Here are a few finished projects the ladies did.

Another…
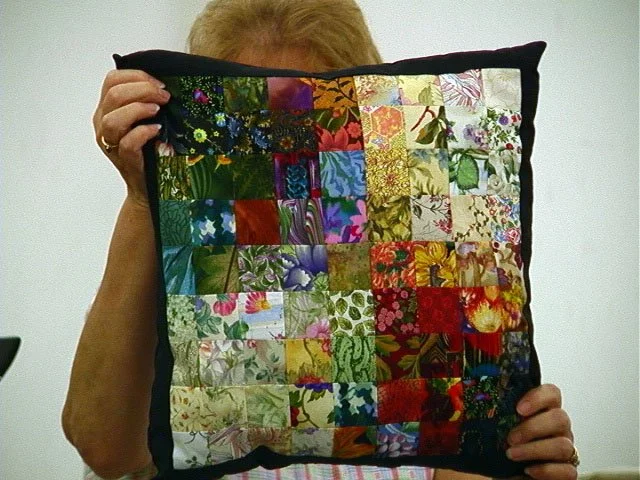
And another…
In Jan., 2005, I did a BTQG guild presentation and then followed over the weekend with a workshop on colorwash. I had the first quilt I had made using colorwash, a queen sized quilt called "Harvesting Life's Treasures", as a sample for what could be done, a colorwash water scene that was my second colorwash quilt, and which may or may not still be finished. (It's a matter of not knowing how I want to quilt it.) Also, I had books showing different designs.
But I wanted a sample that I could show them that illustrated the different steps to go through to do a colorwash quilt. So, I started the hummingbird wall hanging, and took pictures of the steps to use in my handout. I finished the workshop, but not the wall hanging until 2021, when I located all the unfinished projects and grouped them together. I proceeded to tackle them one and one and finished the wall hanging 16 years later.
After the squares are laid out on flannel in the design you want, I start sewing the squares vertically. I remove and lay the first two left vertical rows in precise order, on a firm cardboard or similar structure, so that they do not move or fall. You take them to your machine and starting with the first top 2 squares on the left, you sew the two squares together. Always use a small scrap of material to sew on first as a leader, then start your sewing of the squares. This keeps your threads from bunching up on the back. Once sewn, you do NOT cut the thread or remove the squares from the machine. You pick up the two squares in the second row, place them under the machine, carefully sewing a 1/4" seam. This attaches the first two with the second two, keeping them in their place in the design. Iron the seams in the same direction. Then you carefully lay the 3rd vertical row from the design, place them on your firm structure, take them to the machine, and continue until you have all the squares sewn vertically.
Each time, you iron the seams all in the same direction, but just opposite of the row to the left. This makes it easy to match your seams when you sew them horizontally. You will have your design all attached with your threads, to keep them in order.
I sewed it quickly to have it in time for the presentation, and it was SO MUCH FUN picking and trying the different squares, like trying to find the right piece in a puzzle. It was very cathartic. It's still one of my favorite techniques in quilting. I have TONS of 2 to 2 1/2" squares ready for the next colorwash (a mini stash… LOL).
We had lots of fun sharing fabrics, designing quilts, and the ladies did some unique beautiful quilts.